Network Setting
The Network Setting page is used to view and configure the camera’s IPv4 and IPv6 addresses.
The Network Setting page is accessed by selecting: in the Navigation pane.
Different settings are available depending on the Version selected.
Version: IPv4
User interfaceIPv4 Network Setting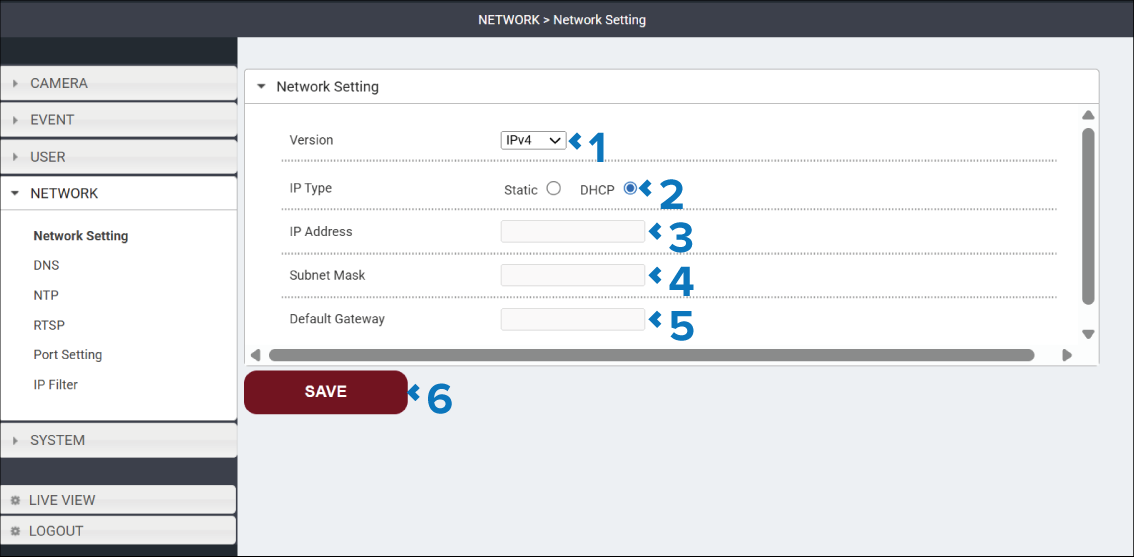
Description |
|
|---|---|
1 |
Version drop down Use the Version drop down to switch between:
Changing the Version will change the available settings. |
2 |
IP Type radio button The majority of systems use DHCP to obtain IP addresses automatically.The available options are:
|
3 |
IP Address field When IP Type is set to Static you can enter an IP Address for the camera. |
4 |
Subnet Mask field When IP Type is set to Static you can enter the network’s Subnet Mask. |
5 |
Default Gateway field When IP Type is set to Static you can enter the IP address for the network’s Default Gateway. |
6 |
SAVE button Select the SAVE button to save any changes you have made before leaving the page. |
Version: IPv6
User interfaceIPv6 Network Setting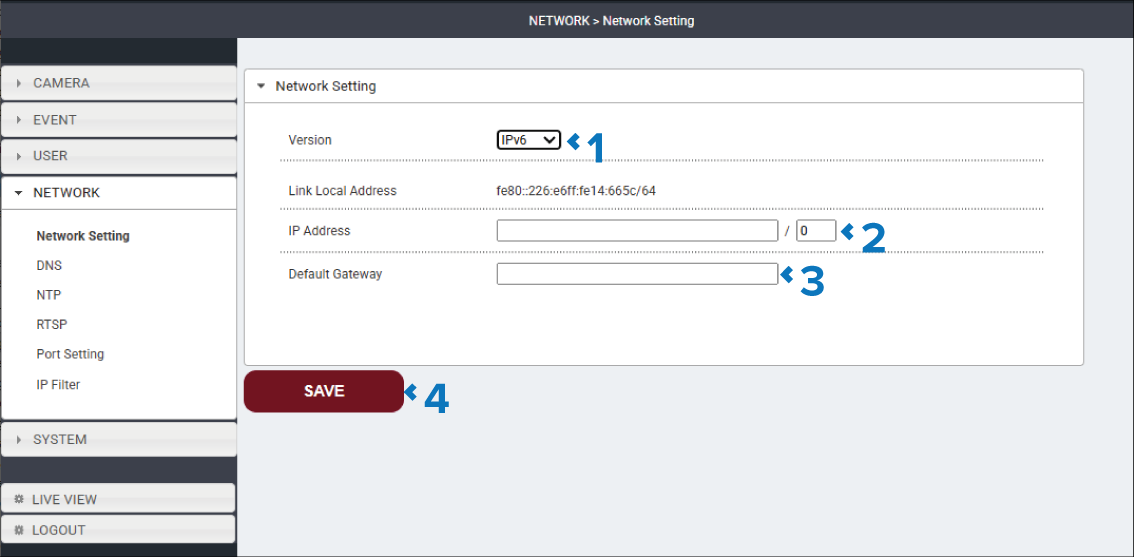
Description |
|
|---|---|
1 |
Version drop down Use the Version drop down to switch between:
|
2 |
Link Local Address Identifies the camera’s IPV6 Link Local Address. If IPv6 is enabled on the client, the Link Local Address is always present, even if the camera has not obtained an IPv4 address from the DHCP server. |
3 |
IP Address field Enter an IPv6 address for the camera. |
4 |
Default Gateway field Enter the IPv6 address for the Default Gateway. |
5 |
SAVE button Select the SAVE button to save any changes you have made before leaving the page. |