MountingCameraCameraMounting
Before mounting the product, ensure that you have:
Selected a suitable location, based on the location requirements
found in this document.
Identified the relevant cable connections and the route that
the cables will take.
- Ensure you have followed the relevant instructions for
preparing the mounting surface.
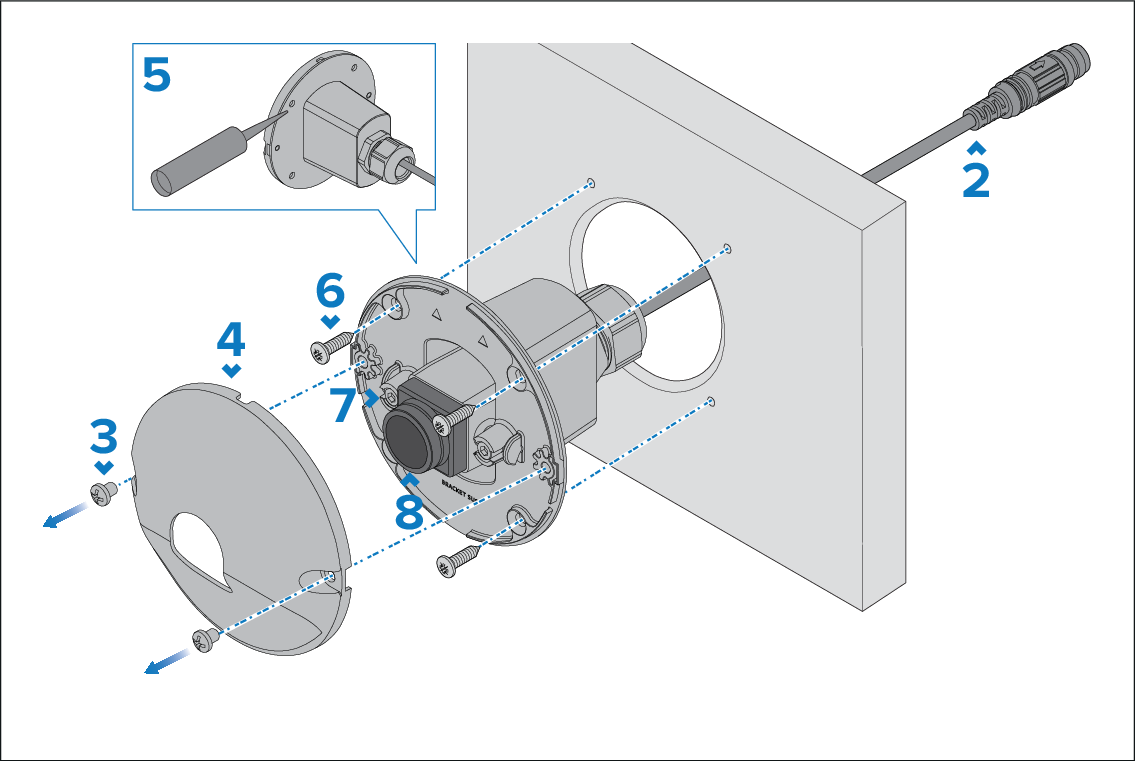
- Route the relevant cables behind the mounting surface cutout.
This may be difficult or not possible once the camera has
been mounted.
- Unscrew the 2 screws which are located at the front of
the SVM camera.
- Remove the cover from the SVM camera.
- Apply an appropriate marine-grade sealant (e.g. Alpha
132 PU Sealant) to the rear of the SVM camera.
- Ensuring that the arrows are facing directly upward and
that the drill holes are aligned with the fixing holes on the SVM’s
front plate, insert the unit’s body into the cutout hole and secure
using the fixing screws provided.
- Using a hex wrench (Allen key), loosen the bolts on either
side of the SVM camera lens.
- Vertically adjust the camera lens to the recommended angle
that has been specified in the supplied placement position file.
- Fully tighten the bolts.
- Place the removed cover and screws back into position and
fully tighten.