Procedure for mounting the gateway. Alternatively, the
gateway can be secured in a suitable location using cable ties.
Pre-requisites:
Ensure you have followed the location requirements guidance
when choosing your mounting location.
When mounting the gateway, it should be mounted vertically
below deck on a flat surface as shown below.
Ensure that the provided fixings are suitable for the mounting
surface material and thickness.
Installation GatewayMounting Gateway
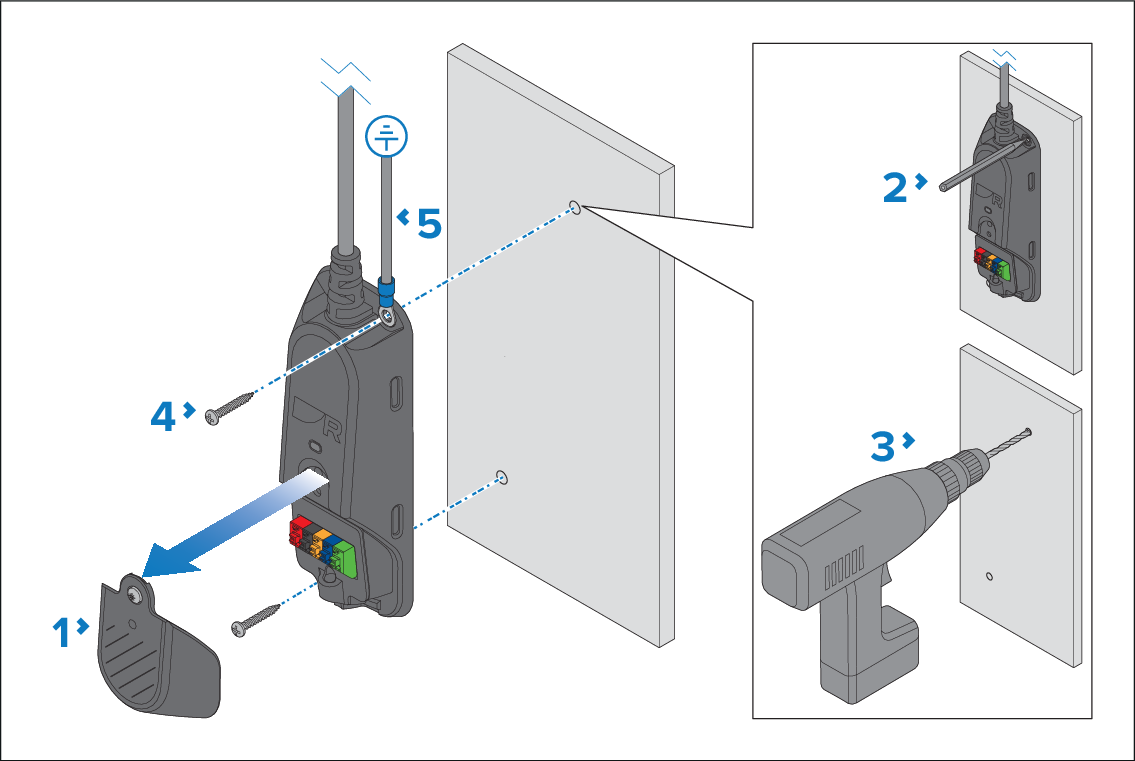
Unscrew the cover’s retaining screw from the front of the
gateway.
The screw is captive, so it cannot be removed completely.
Use either the gateway as a guide or use the supplied mounting
template to mark the hole locations on the mounting surface.
Drill 2 pilot holes at the marked locations.
Note
The pilot hole size must be suitable for the
material type and thickness of the mounting surface.
Secure the gateway to the mounting surface using the fixings.
The supplied ring crimp terminal and a suitable cable (not
supplied) should be used to create a ground connection. The ring crimp
terminal should then be connected to the top fixing hole so that it
is secured when tightening the fixings. Connect the other end of the
cable to the vessel’s RF ground point. If no RF ground is available,
connect directly to the vessel’s negative (-) battery terminal. For
more information, refer to: Gateway ground connection
Do not replace the cover until all mast cable wires
have been connected.