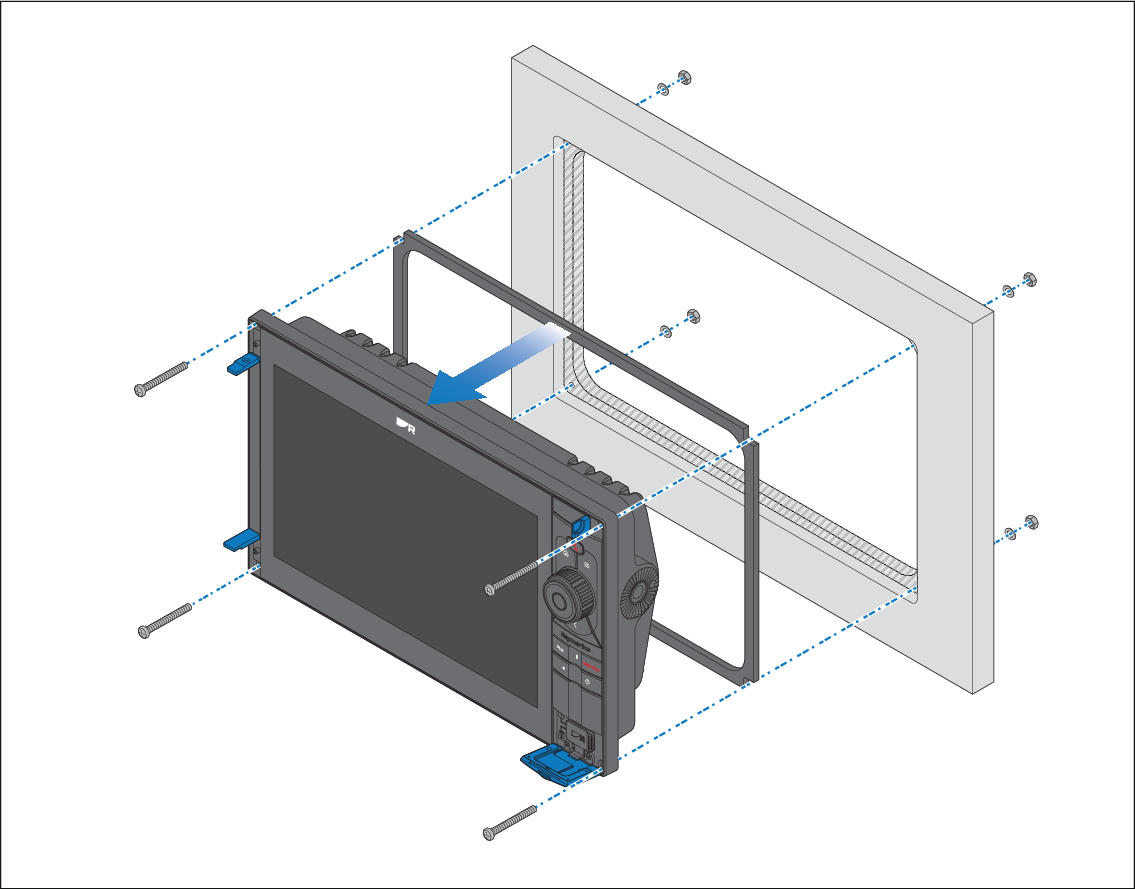
Flush mounting
Follow the steps below to flush mount the display.
Important
The supplied gasket provides a seal between the display and a suitably flat and rigid mounting surface or binnacle. The gasket should be used in all installations. It may also be necessary to use a marine-grade sealant if the mounting surface or binnacle is not entirely flat and/or has a rough surface finish.
In above decks installations, marine-grade sealant should always be used to seal the gap between the edge of the mounting surface and the edge of the display.
Take care not to block the breather hole with sealant. The breather hole is located on the bottom of the display, next to the product label.