Making the Radar cable connection
ConnectionsRear panelRear panel
Before connecting the combined power-and-data cable to the Radar, ensure that:
The vessel's power supply is switched off.
The multifunction display / chartplotter being connected to the scanner has been installed in accordance with the installation instructions supplied with that device.
You loosen the rear-panel retaining screw, and carefully pull the rear panel away from the rear of the scanner.
The retaining screw is permanently attached to the rear panel to prevent loss, and the rear panel remains attached to the scanner with a lanyard. Do not attempt to detach the lanyard, or to completely remove the retaining screw from the rear panel.
If necessary, the combined power-and-data cable has been routed within the scanner base. The cable routing option required will depend on the mounting location that you have chosen for your scanner. For more information, refer to: Cable routing options
In order to connect the combined power-and-data cable:
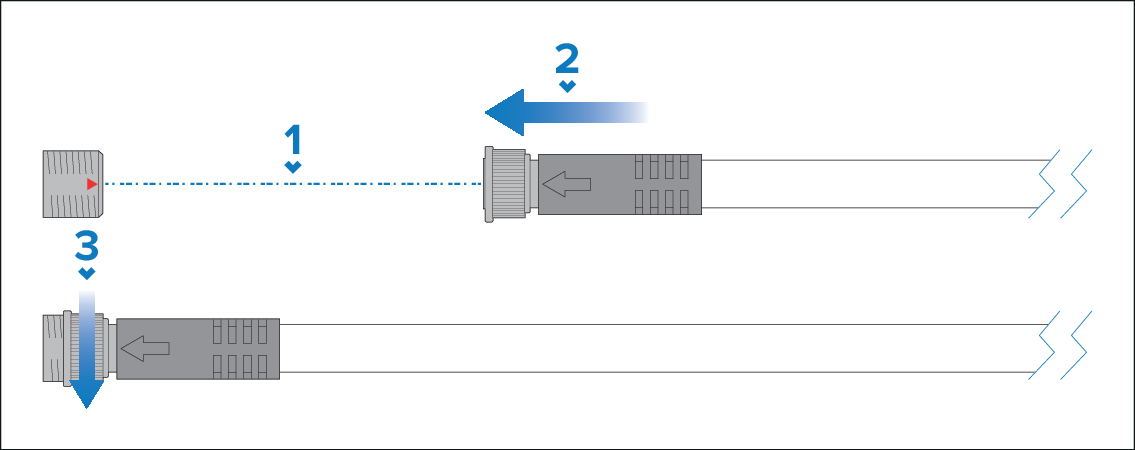
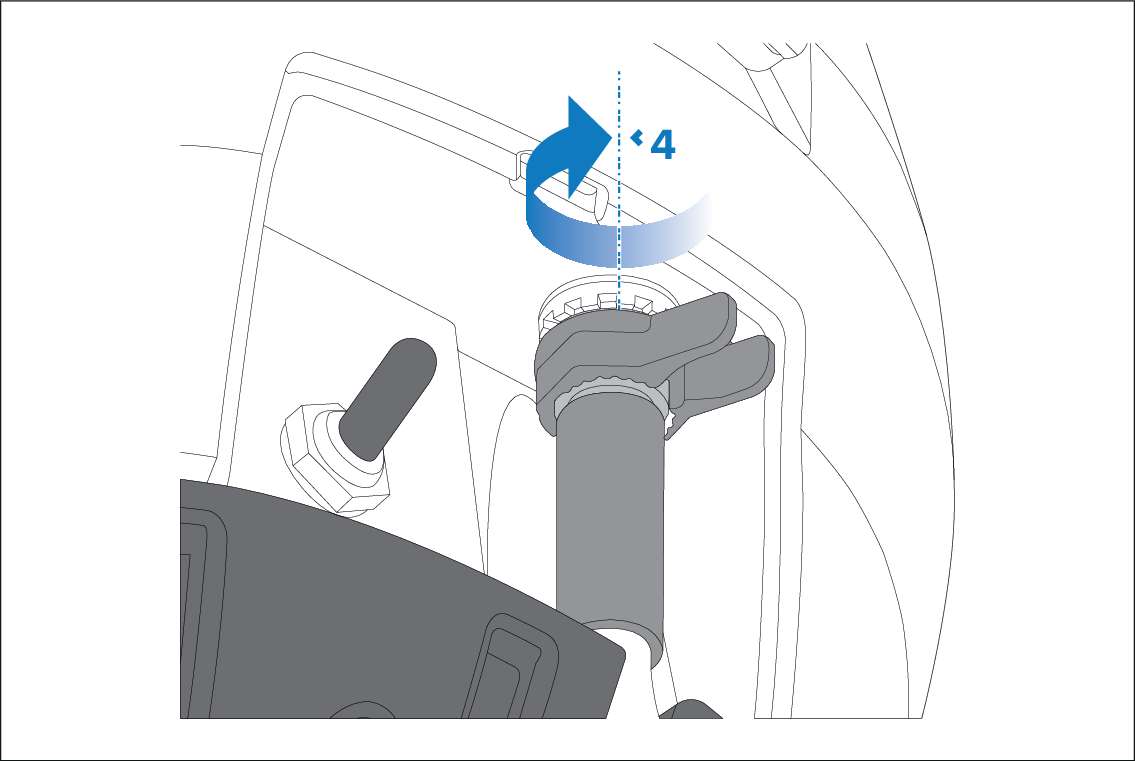
- Hand-tighten the locking collar on the combined power-and-data
cable connector.
If the cable plug is disconnected after the initial installation, Raymarine recommends that you lightly coat the connector thread with water-repellent grease before reconnecting.