The supplied deck mounting kit is used to mount
the unit on a vertical surface.
InstallationBracket mountBracket mount
Ensure that
the chosen location meets the product’s location requirements. For
more information, refer to: Location requirements
Important
The installation must only be
performed with the vessel either on a hard standing, or tied-up alongside
a pontoon or berth.
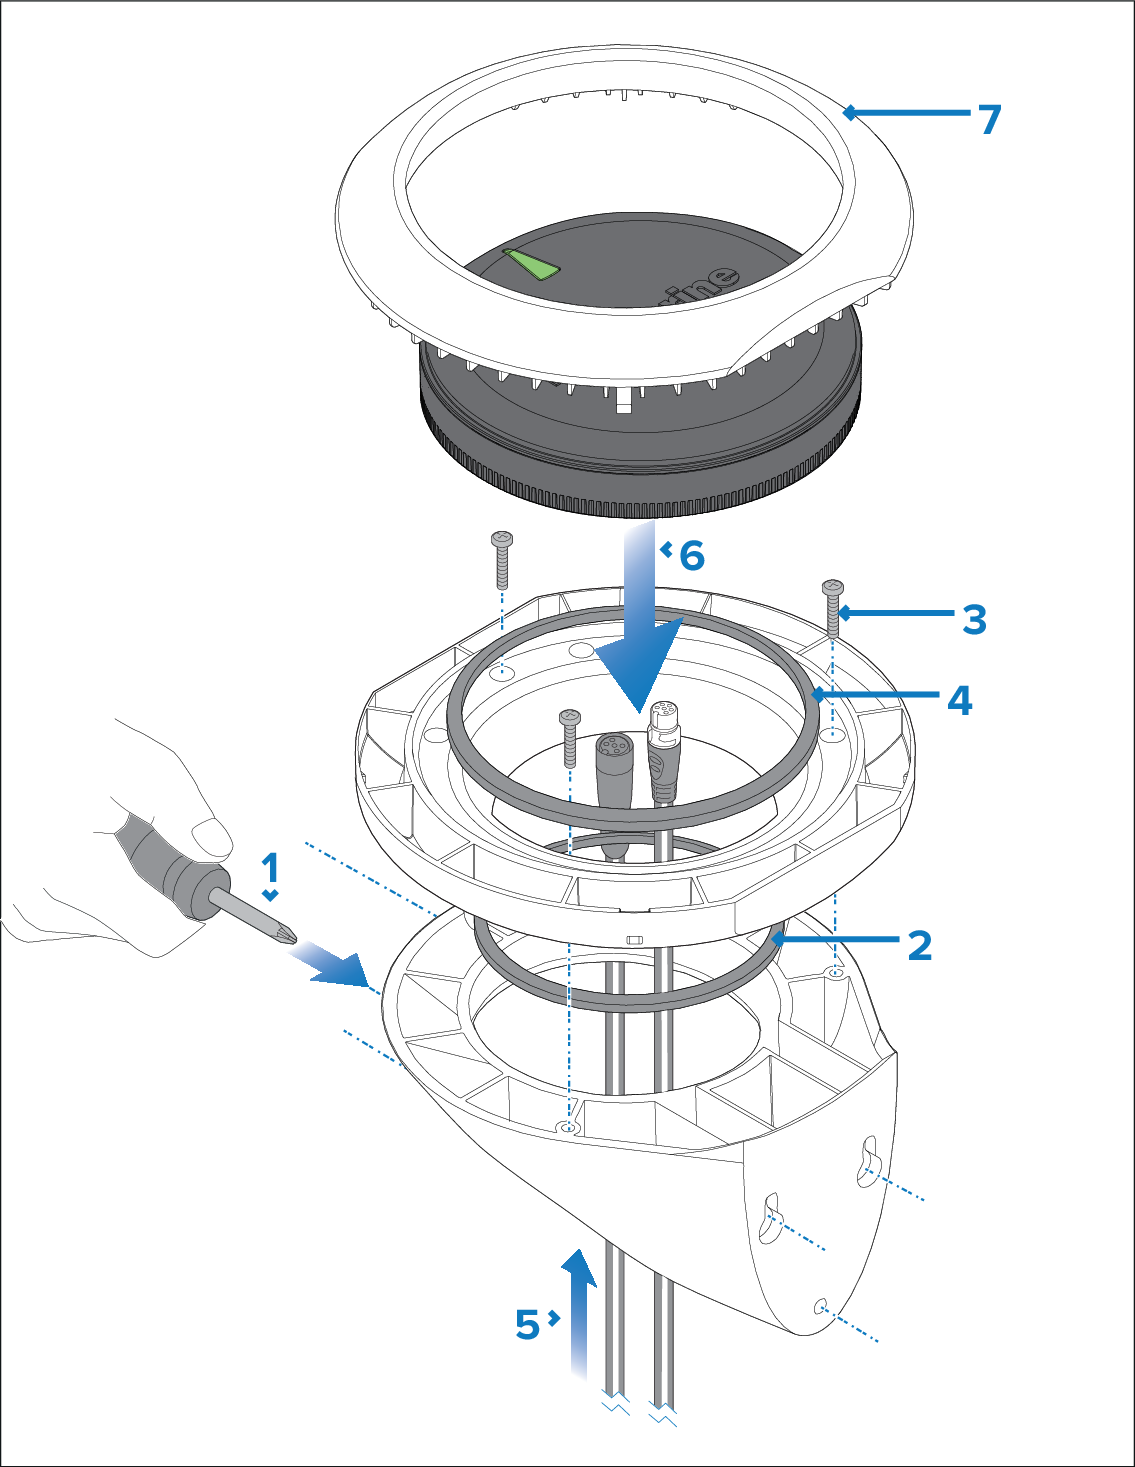
Use the mounting bracket template (87170) to drill 3 pilot holes in the vertical mounting surface. Secure
the mounting bracket to the surface using the supplied screws.
Place the small sealing ring in the groove located on the
bottom of the mounting tray.
Secure the tray to the bracket using 3 of the supplied
screws in the positions indicated in the illustration above.
Place the large sealing ring into the groove on the upper
side of the Mounting tray.
Pull the SeaTalk NG and DeviceNet cables through
the mounting surface hole and the mounting tray. Plug in the cable
connectors on the underside of the unit and secure as follows:
SeaTalk NG cable
— secure by rotating the locking collar clockwise 2 clicks.
DeviceNet cable
— secure by turning the cable connector’s collar clockwise until tight.
Insert the unit into the mounting tray, ensuring the tabs
in the mounting tray are slotted into the grooves around the edge
of the unit.
Important
The unit must be mounted with the
LED ‘arrow’ in parallel alignment with the longitudinal axis (centerline)
of the vessel and be pointing towards the vessel’s bow.
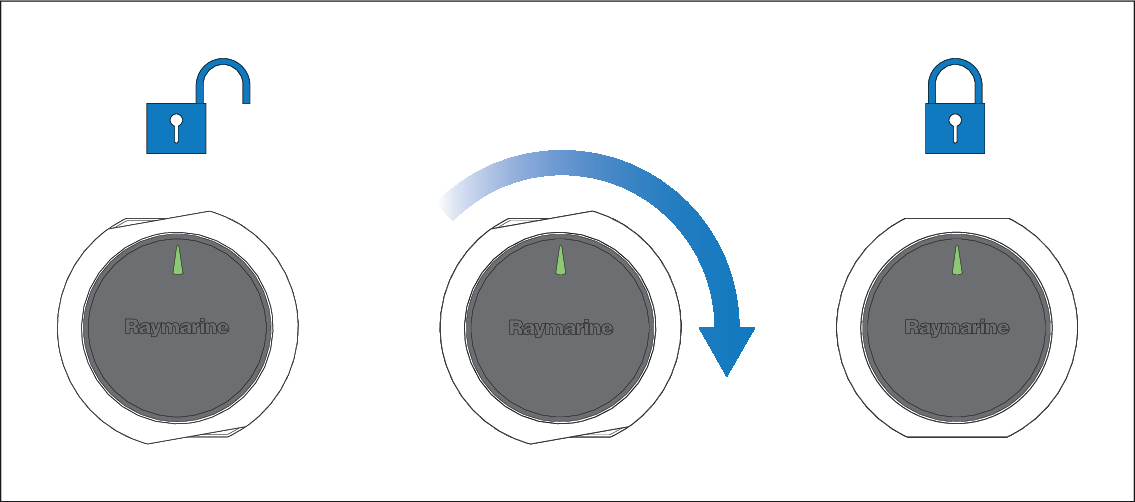
Place the mounting trim over the unit slightly offset,
and then twist the mounting trim clockwise until it locks into position.