Example scenario 1 — Own vessel moving faster than target vessel
Note These scenarios are examples provided for guidance only.
Figure 2. Scenario 1 Speed change examples
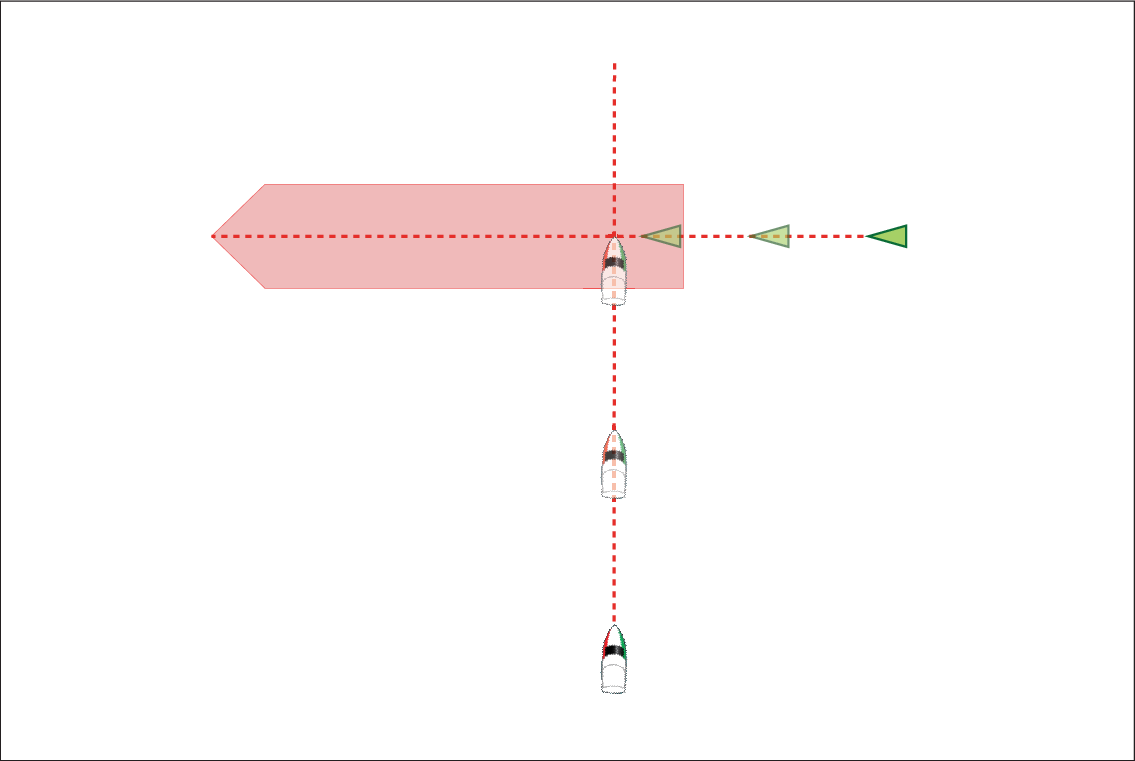
In the example above the vessel’s COG will cross with the target’s COG within the Interception zone, which could cause a collision. You should alter course and / or speed to avoid the potential collision.
Collision avoidanceCourse change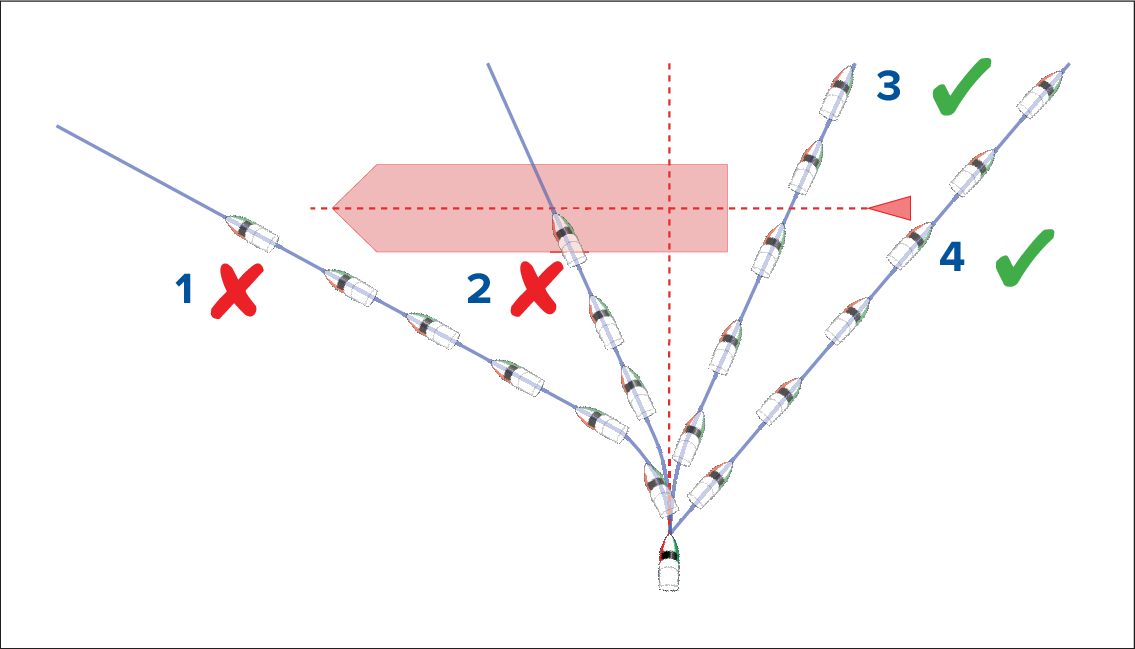
- Course alteration to pass ahead of the Interception zone [Not recommended] — Proceed with caution, there is always an inherent risk when passing in front of other vessels.
- Course alteration to pass ahead of the target vessel [Not recommended] — This manoeuvre is not recommended as your vessel will still cross through the target’s Interception zone.
- Course alteration to pass astern of the target vessel and its Interception zone — This manoeuvre alters your vessel’s course so that it does not come into contact with the target’s Interception zone and passes astern of the target.
- Course alteration to pass clear astern of the target vessel and its Interception zone. This is the preferred manoeuvre as it correctly alters your vessel’s course so that it is clear of the target’s Interception zone and passes safely astern of the target. This manoeuvre also clearly indicates to the target vessel your actual change of course.
Figure 1. Scenario 1 Course change examples
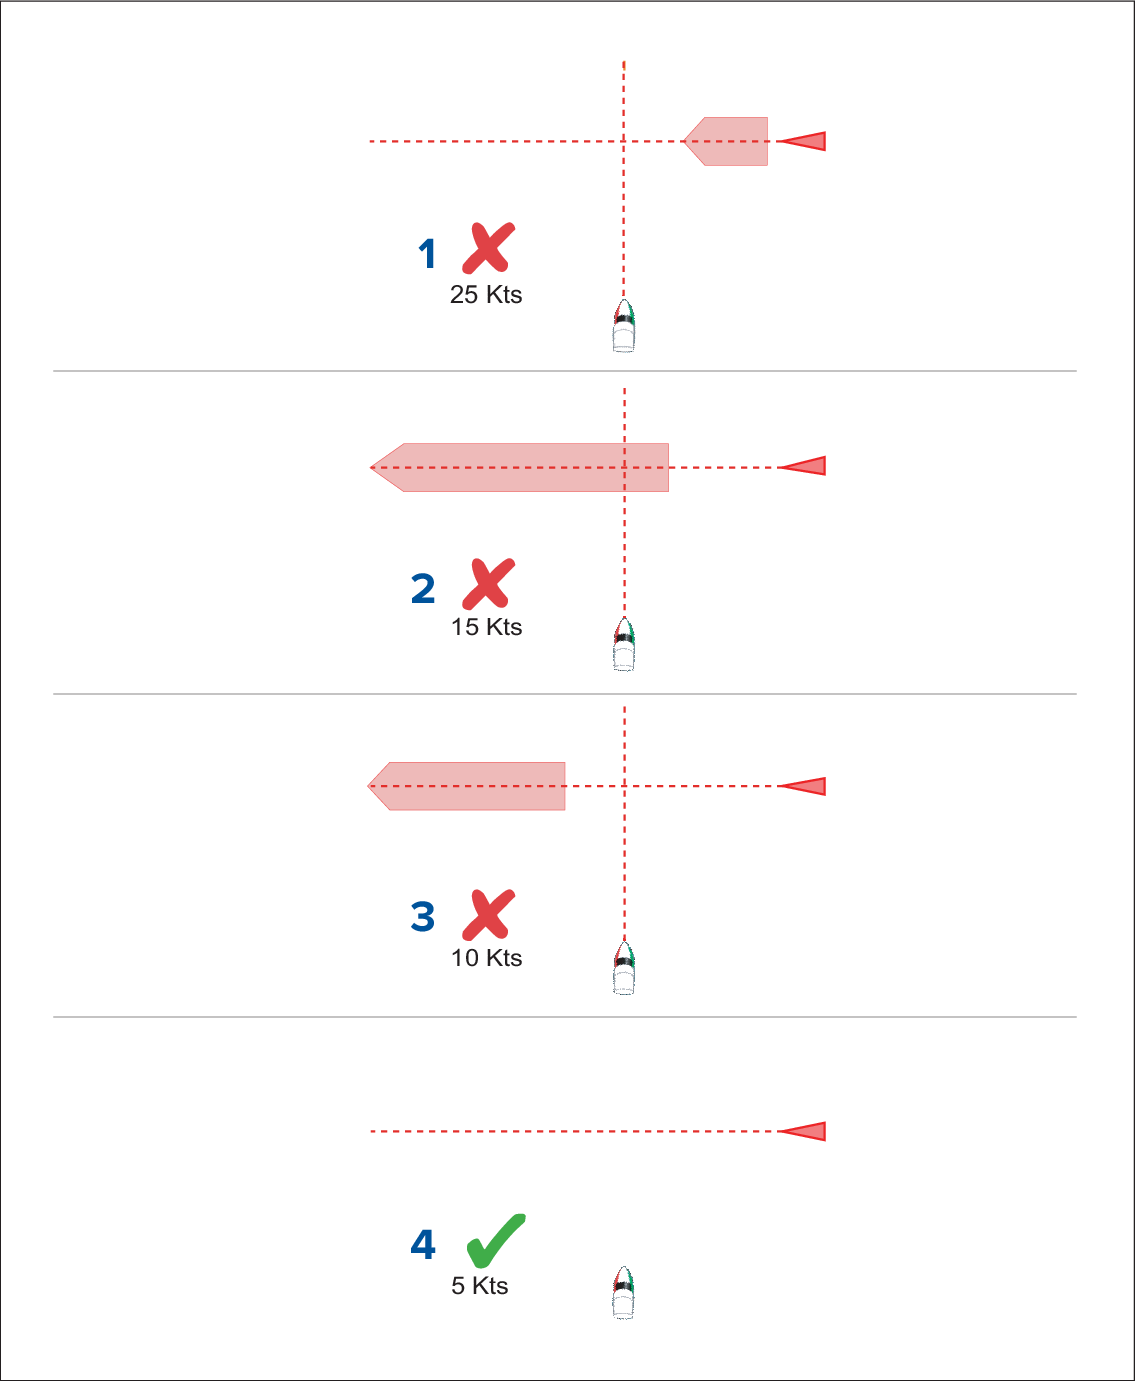
- (1)Speeding up [Not recommended] — Increasing vessel speed to pass ahead of the target vessel. Proceed with caution, there is always an inherent risk when passing in front of other vessels.
- No speed change [Not recommended] — Not changing speed or course is not an option as it can result in a collision.
- Slowing down [Not recommended] — Slowing down a sufficient amount will allow the target vessel to pass ahead of your vessel.
- (2)Slowing down — Slowing down more than a sufficient amount will allow the target vessel to pass safely ahead of your vessel.
Note
- (1) In this example the paths will still cross within the Intercept distance, so the graphics are still displayed.
- (2) In this example the paths will no longer cross within the Intercept distance, so the graphics are not displayed.