Assembling Master or Remote systems
The method for assembling Master systems and Remote systems is the same.
Important
Modules must be assembled in the order that they have been configured.
The maximum number of input/ouptut modules per Master or Remote system is 6.
Note
Raymarine recommends that modules are placed in order of their potential maximum current draw, with the lowest placed closer to the Master or Remote module and the highest placed closer to the Power supply module.
Example: Master/Remote module > Signal module(s) > Low power module(s) > High power module(s) > Reversing module(s) > Power supply module.
- Connect the input and output modules to the Master or Remote
module in configuration order.
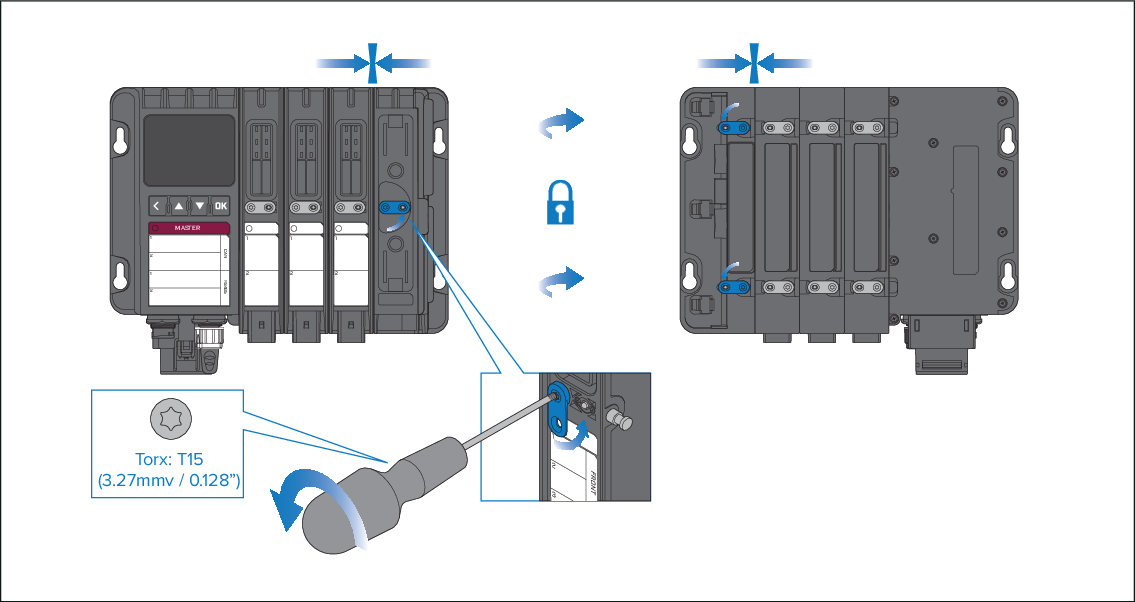
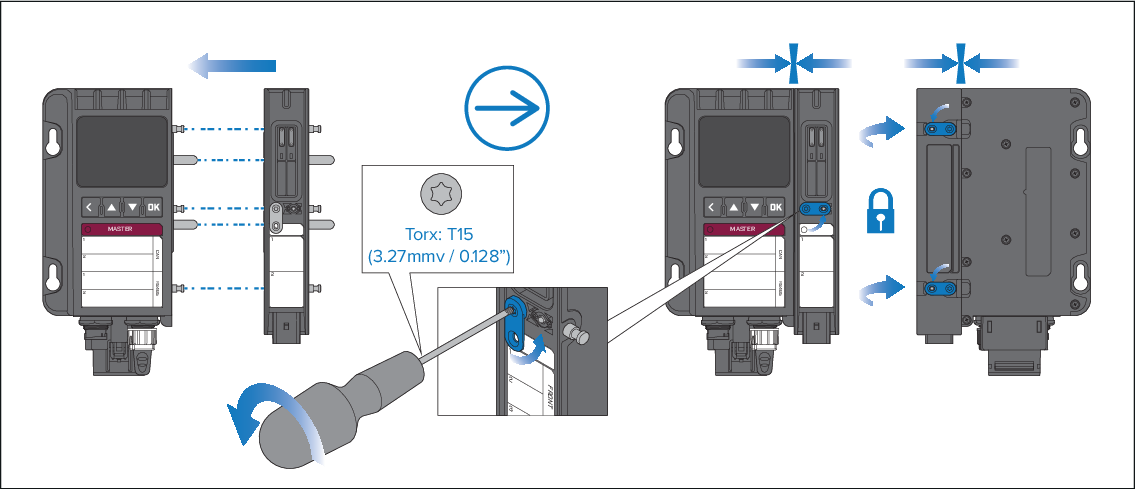
- Connect modules by lining up the locking pins, power bars and connector slot on the Master or Remote module with the relevant holes and connector on the input or output module and slot into place.
- Secure the modules by holding the modules together and then turning all the camlocks counter-clockwise until they are locked in position by the center pin.
Use a T15 size Torxs driver to help turn the locking tabs.
- Connect the power supply module to the end of the Master
system assembly or Remote system assembly following the same instructions
as the step above.