Surface mounting using the rear mounting kit

The following steps provide instructions on how to surface mount your display using the rear mounting kit. The rear mounting kit is supplied with all Axiom 2 9" and Axiom 2 12" display variants and with some Axiom 2 7" display variants.

InstallationSurface mountingRear mounting kitMountingSurface mountingRear mounting kitSurface mountingRear mounting kit

Note

(Axiom 2 7" only) If your display variant did not include the rear mounting kit, one can be ordered separately; refer to the following section:

Important
  • The supplied gasket provides a seal between the display and a suitably flat and rigid mounting surface or binnacle. The gasket should be used in all installations. It may also be necessary to use a marine-grade sealant if the mounting surface or binnacle is not entirely flat and / or has a rough surface finish.

  • In above decks installations, marine-grade sealant should always be used to seal the gap between the edge of the mounting surface and the edge of the display.
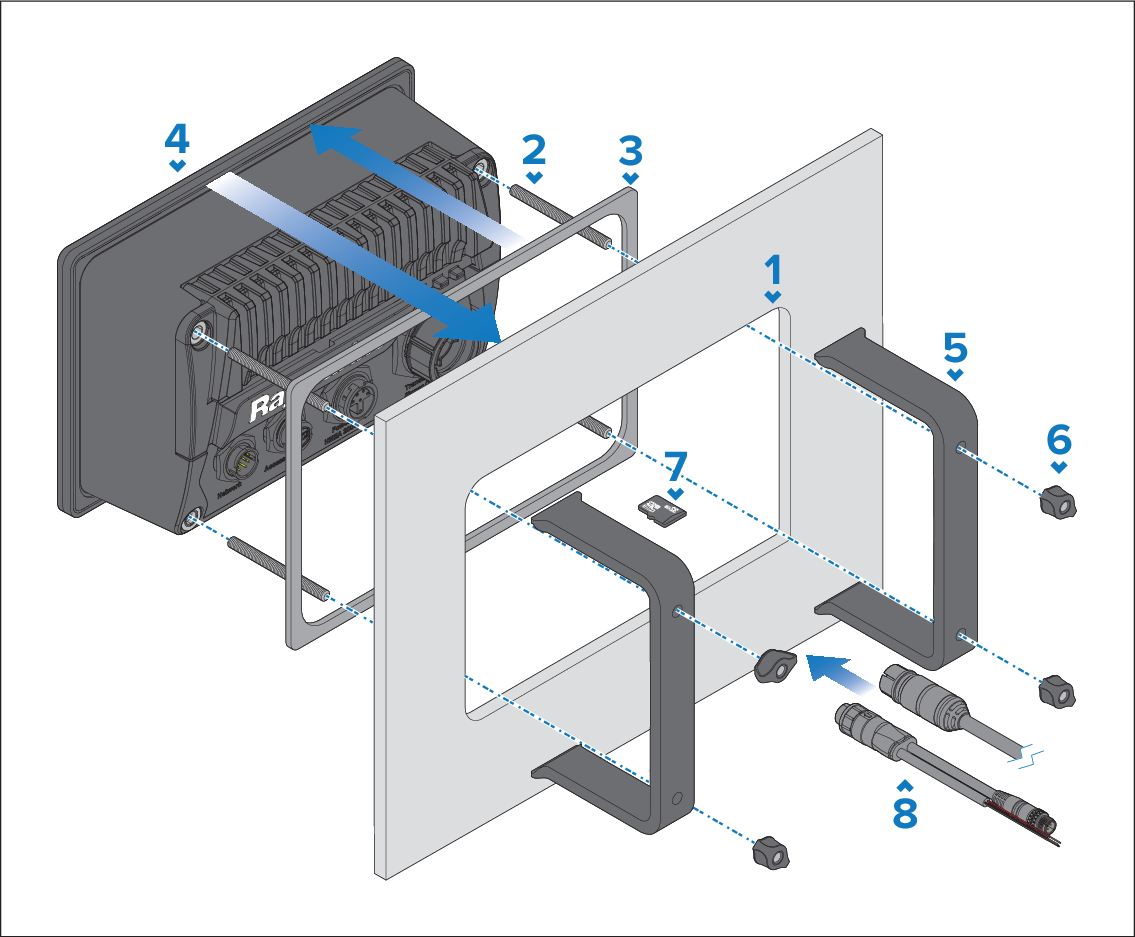
  1. (Axiom 2 7" only) Ensure that the pre-fitted trunnion adaptor has been removed from the rear of the display in accordance with the instructions provided in the following section:
  2. Ensure that the mounting surface has been prepared for surface mounting in accordance with the instructions provided in the following section:
  3. Route the relevant cables to the area behind the mounting surface cut-out.

    This may be difficult or not possible once the display has been mounted.

  4. Screw the 4 x supplied M5x58 threaded studs into the rear of the display.
  5. Remove the backing from the supplied gasket and place the sticky side of the gasket onto the flange on the rear of the display. Press firmly onto the flange.
  6. If required, insert your MicroSD card into the card reader which is located behind the rubber bung on the rear of the display.

    Once the display is mounted, the card reader slot may be difficult to access, or be completely inaccessible.

  7. Connect the relevant cables to the rear of the display.
  8. Slide the display into the cut-out area.
  9. Place the rear mounting brackets over the threaded studs.

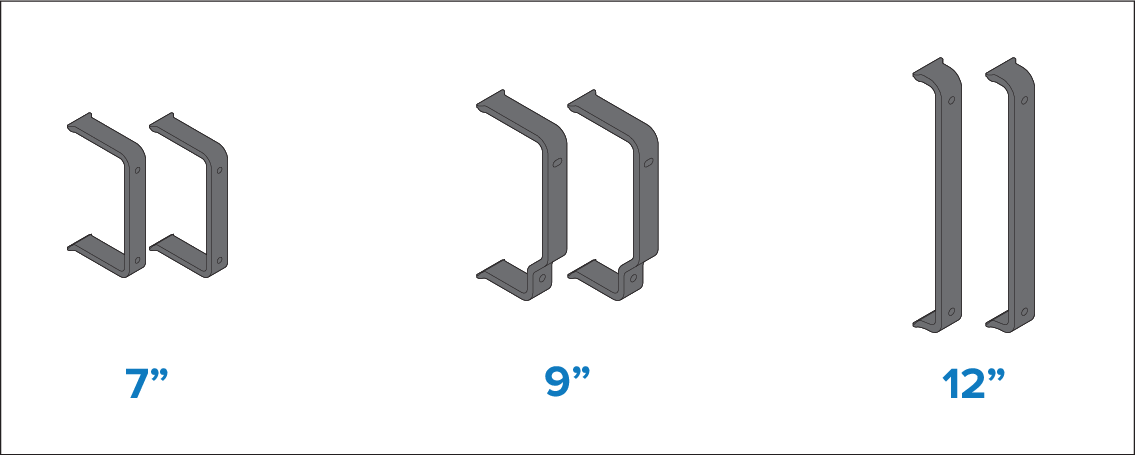
    The appearance of the brackets which are supplied with your display may differ from that shown, due to the differences in size between each of the Axiom 2 7" 9" & 12" variants. However, the installation procedure will remain the same.
  10. Secure the display in position by placing the 4x supplied M5 thumb nuts onto the threaded studs and then hand-tightening until secure.
    Important

    To prevent potential damage to the unit, do NOT overtighten the thumb nuts. Hand tighten only.