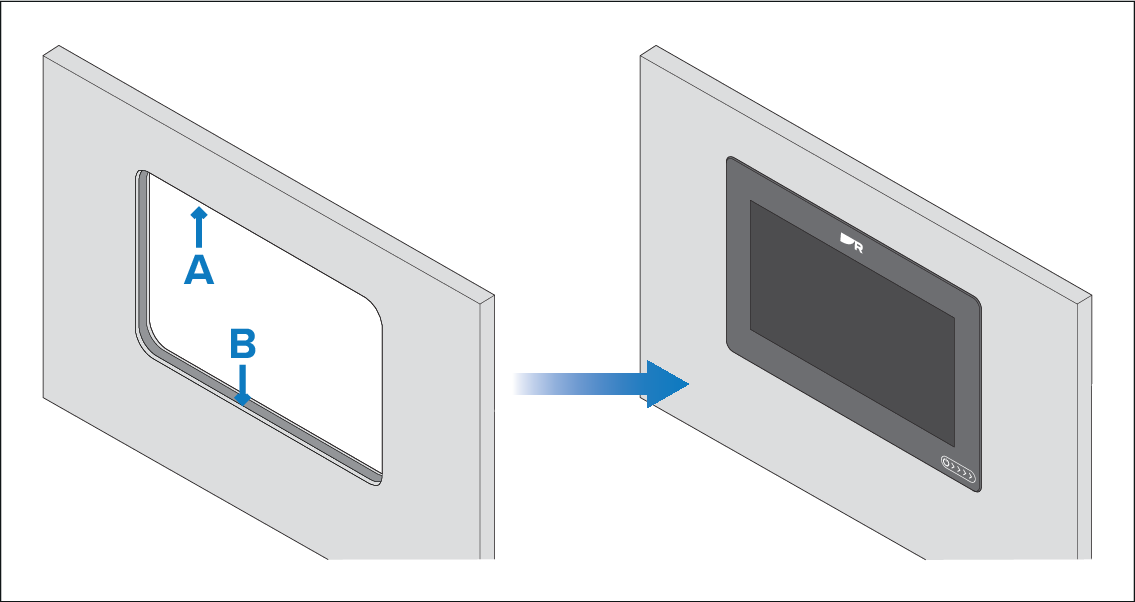
Flush mounting requires the same cut-out hole as surface
mounting, and an additional rebate around the edge of the cut-out.
When the display is flush mounted, the glass / bezel will be flush
with the mounting surface.
You have identified cable connections and the route that the
cables will take.
Installation Flush
mountingFlush mounting
A — Cut-out (when flush mounting, the cut-out will be
the same size as for surface mounting.
B — Flush mounting requires an extra rebate to fully
recess the display in the mounting surface.
Mark the cut-out line on the mounting surface, as
identified on the supplied mounting template.
Mark on the mounting surface the Flush mount rebate line, as identified on the supplied mounting template.
Use a drill and an appropriate size drill bit or hole-cutter
to cut out the corners of the Cut-out line.
The corner diameter for each display is:
20.00 mm (0.79 in) — 7” and 12” displays.
24.00 mm (0.94 in) — 9” displays.
Use a jigsaw or similar cutting tool to cut out the remainder
of the Cut-out area.
Use a router hand tool to recess the marked Flush mount
rebate area, to a depth of 8.00 mm (0.31 in).
Carefully (and temporarily) fit the display to the cut-out
area, to check for a good fit. Do not use any fixings at this time. If the fit is very tight, it may be necessary to remove the display
and file the edges of the cut-out to achieve a better fit, using a
half-round file and / or sandpaper. Alternatively, if the fit is loose
and there is a visible gap between the edge of the display and the
cut-out, this will need to be filled with marine-grade sealant or
suitable packing material to fill the gap. This should only be
done once the display has been secured to the surface using the fixings,
as described in the next mounting procedure.