Axiom® 2 Pro 16
displays are intended to be either surface or flush mounted. An optional
Trunnion bracket kit (part number: A80722) is available
if trunnion mounting is desired. For trunnion mounting, the display
needs to be prepared using the parts supplied in the A80722 kit.
Important
The display is supplied with rubber
trunnion bungs fitted, which must be removed before the display is
trunnion mounted. Do NOT attempt to trunnion mount the display using
the trunnion bungs.
To prepare the display for trunnion
mounting, follow the steps below, for both sides of the display:
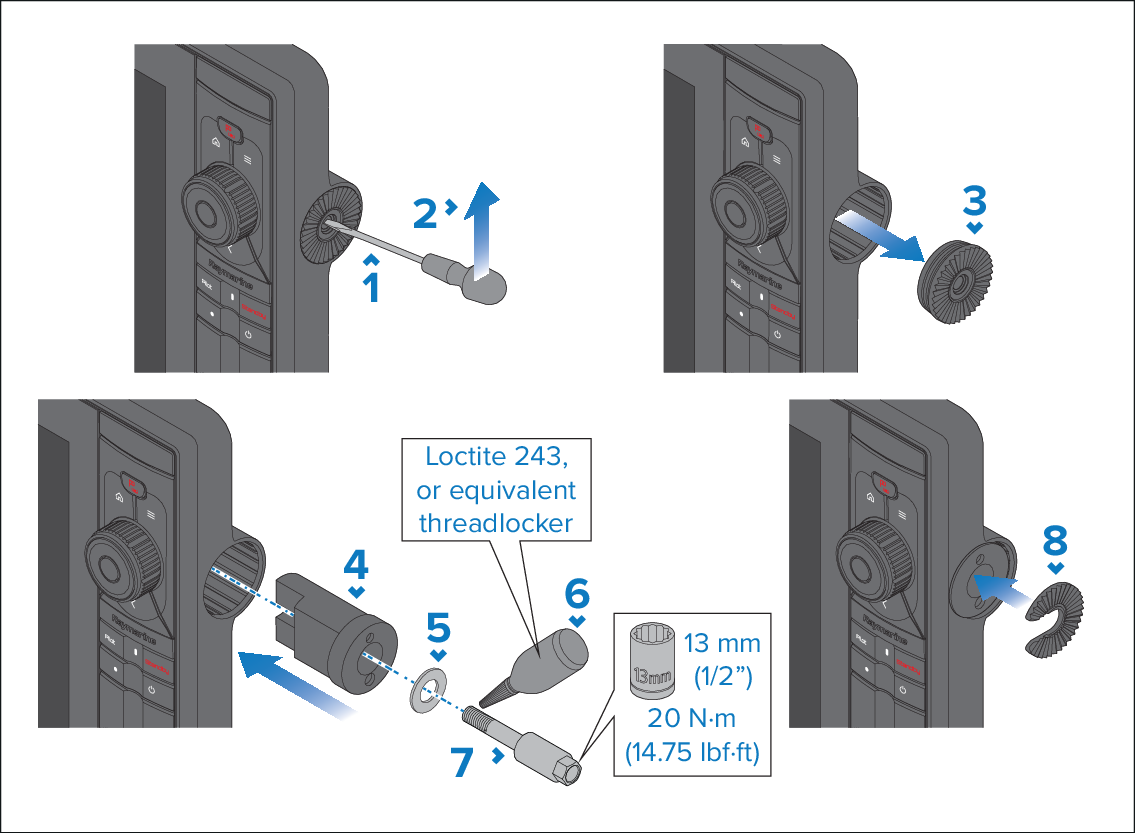
Insert a small flat blade screwdriver or plastic pry tool
into the center hole of the Trunnion bung.
Lever the tool up or down to release the Trunnion bung.
Remove the Trunnion bung.
Insert the Spacer piece into the display with the flat
edge facing forward.
Important
Do NOT fit the ratchet plate to the
spacer before tightening the standoff bolt.
Slide the M8 washer over the M8 standoff bolt.
Apply Loctite® 243 (or equivalent
threadlocker) to the thread of the M8 standoff bolt.
Insert the M8 standoff bolt and tighten to 20 N·m (14.75 lbf·ft).
Note
Overtightening may cause damage.
Remove the backing from the self adhesive tape on the rear
of the Ratchet plate, and fix to the Spacer secured in the display.
The groove on the ratchet plate should face forwards and
the protrusions on the back of the ratchet plate should slot into
the recesses in the end of the spacer.