Mounting the transom mount bracket
The transducer must be mounted on the transom
using the mounting bracket provided. The steps below describe the
initial mounting steps required in order to test your transducer’s
performance.
Important
Bracket mountingTransducer
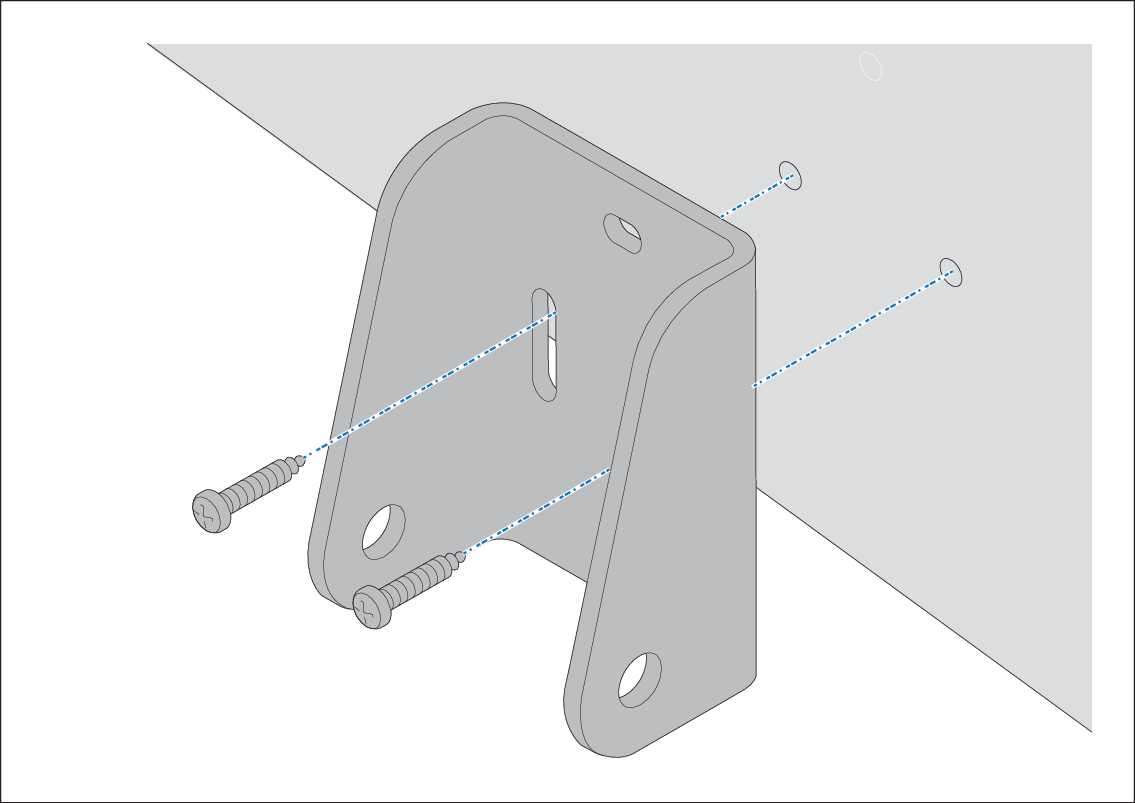
mountingInitially only the 2 holes for the height adjustment screws are required to secure the mounting bracket to the transom. The third screw is used to finalize the installation once the transducer has been tested and adjusted to obtain optimum performance.
To help prevent chipping of fiberglass hulls, use painter’s tape to mask the drill hole areas, behind the mounting template.
- Using a pozi-drive screw driver and the screws provided, secure the
transom mount bracket using the 2 adjustment slots.
 Note
The third screw is not used until the transducer has been successfully tested.