Mounting the scanner
Use a mounting location that:
Is robust enough to support the Quantum™ scanner, under seagoing conditions.
Meets the requirements described under Scanner Position.
InstallationMountingThen:
- Tape the template to the mounting platform, ensuring that
the arrow on the template is pointed towards the front of the vessel.
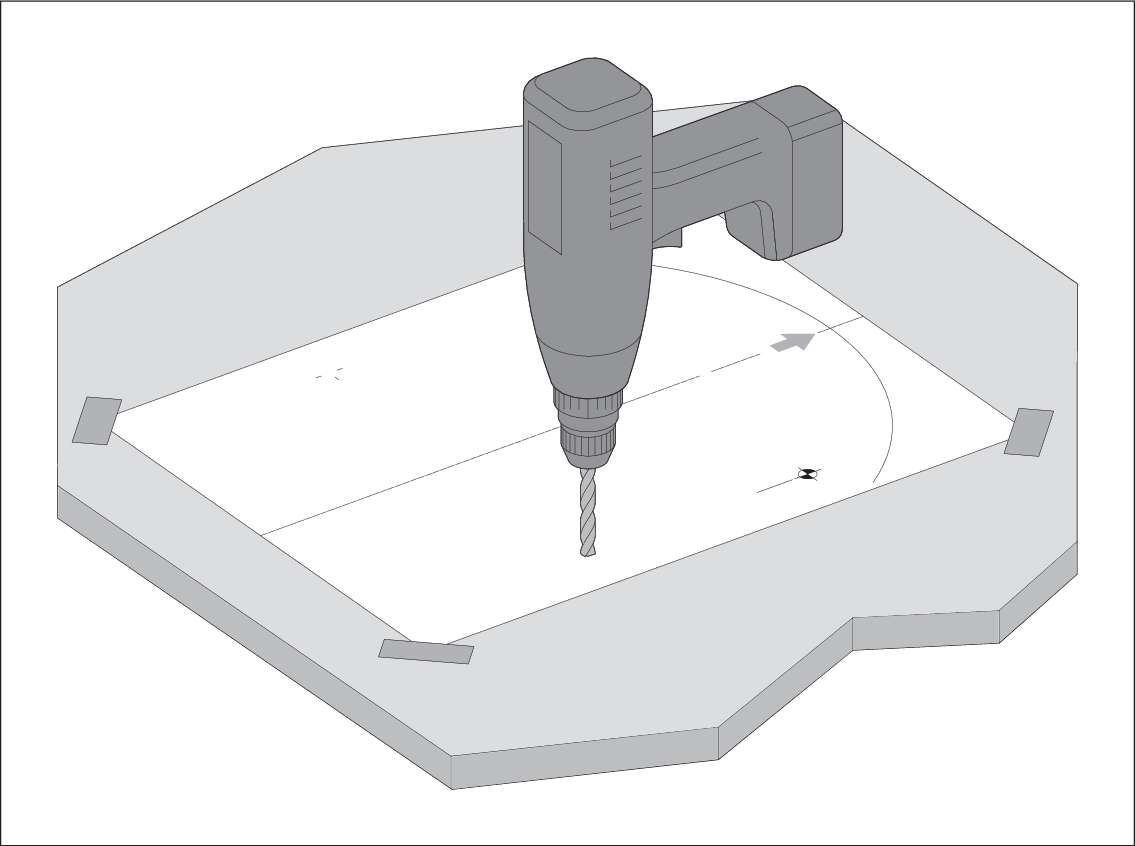
- Place the Quantum™ scanner in position.
If you are fitting it on a planing vessel, shim the rear of the scanner,
so that the beam points slightly down in the forward direction when
the boat is at rest, to compensate for the bow rising at cruising
speed
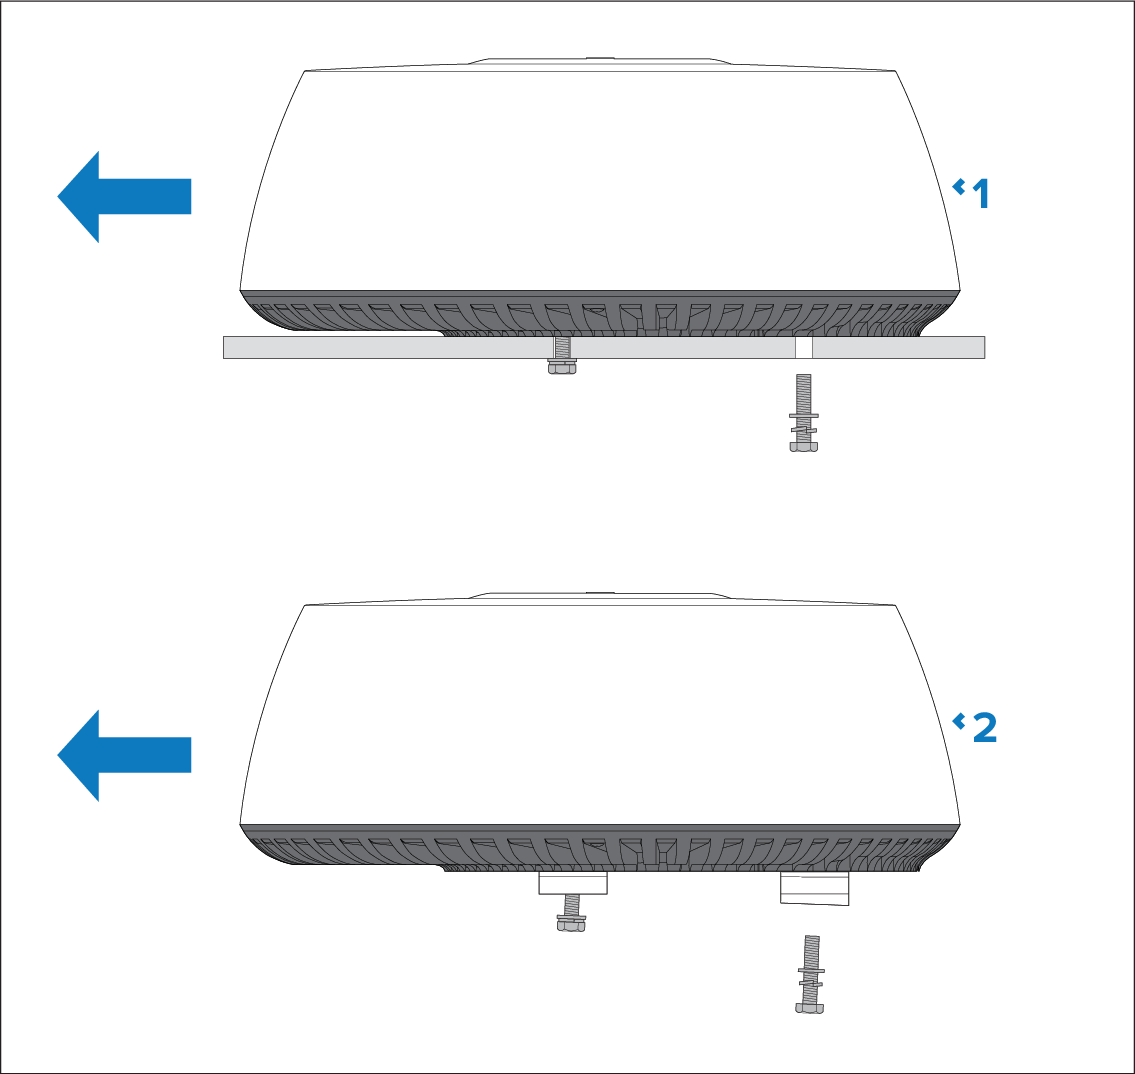
Description
1
Mounting platform, non-planing boat (level install)
2
Mounting platform, planing boat (typical planing angle shown)
- Ensuring that the bolts have a minimum insertion
in the scanner base of 16 mm (0.63 in.), and a maximum of 22 mm
(0.87 in.) (allowing for washers), secure the scanner with the 4 bolts,
flat washers and spring washers provided, as illustrated. If necessary,
use appropriate shims or extra washers to limit the length of bolt
entering the scanner base.

- Attach a safety lanyard (not supplied) to your vessel,
and secure the free end to the scanner using the attachment point
shown in the following illustration:
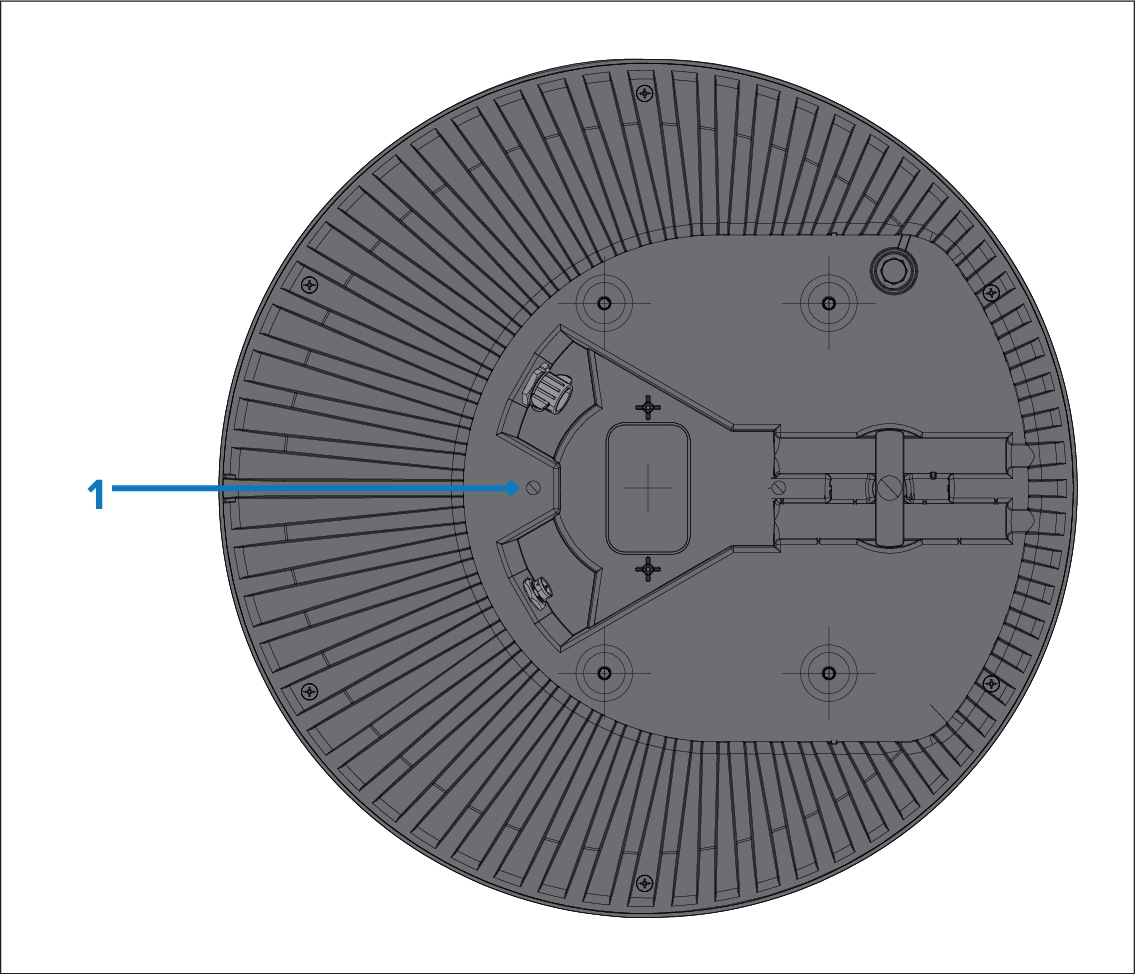
Description
1
Safety lanyard attachment point.
Note
If you are installing the Radar scanner on a sailing vessel, additional protection for the Radar scanner may be required. Refer to Radar scanner protection — sailing vessels