Instructions for mounting the VCM100.
InstallationVCM100MountingMountingVCM100
Before mounting the unit, ensure that you have:
Important The VCM100 is splashproof,
and suitable for mounting below decks only.
Important Do NOT connect any cables to the
power supply until the following steps have been completed.
- Check the selected location for the unit. The VCM100 requires a
clear, flat, vertical surface with suitable space for routing the
cables below the unit.
- Hold the VCM100 in place at the required mounting location.
- Using a pencil, mark the drilling area inside the mounting
lug on each side of the VCM100 unit.
- Using a 3 mm (0.1 in) drill bit, drill holes at the marked
locations.
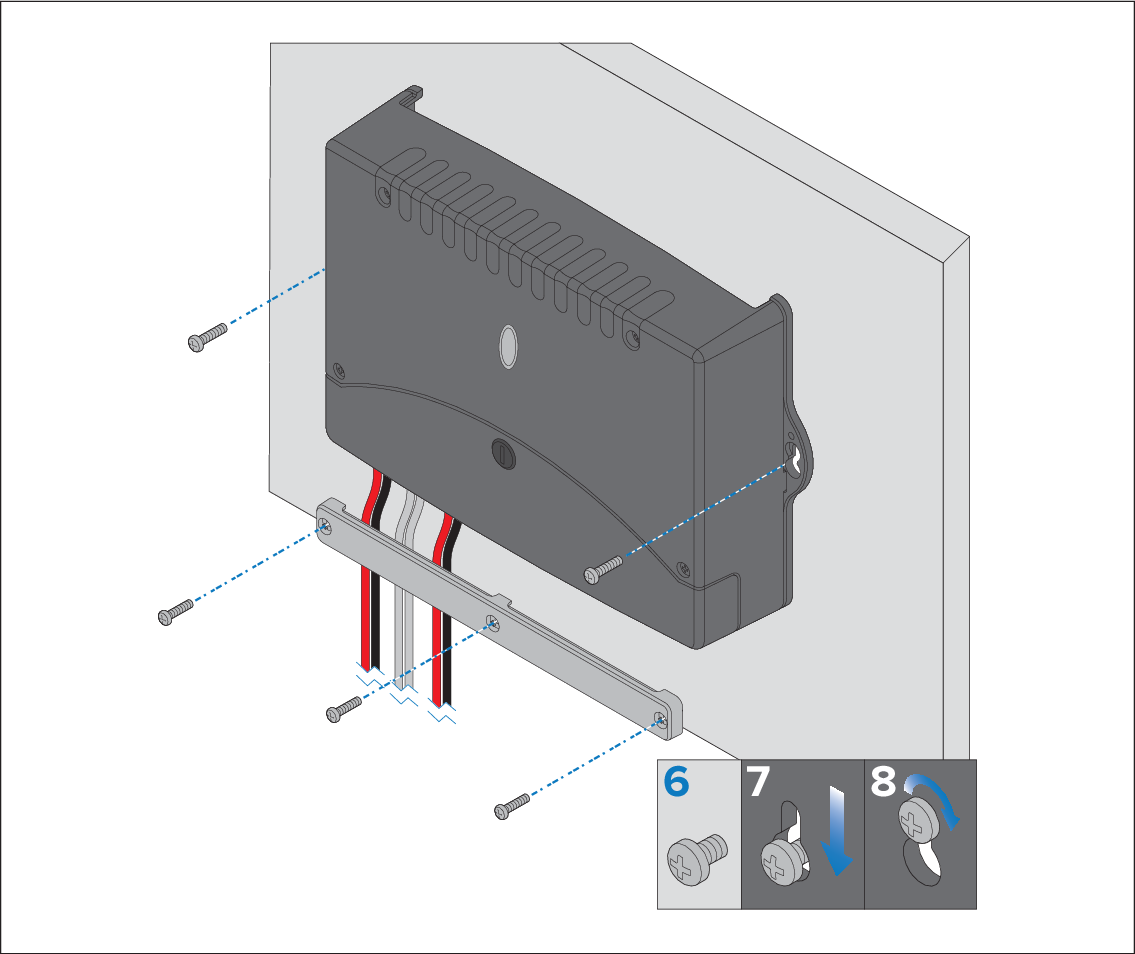
- Using a suitable screwdriver, screw the self-tapping mounting
screws approximately halfway into the drilled holes.
- Align the VCM100 mounting lugs
with the drill holes.
- Place the VCM100 into position,
and ensure that the VCM100 slides down into position.
- Secure the VCM100 by fully tightening
the screws.
- Connect the cables, according to the instructions provided
in this document.
- Hold the cable clamp in place over the cables, approximately
50 mm (2 in) below the mounted VCM100 unit.
- Using a pencil, mark the drilling area inside each mounting
bracket hole.
Ensure that the cables do NOT cover the holes.
- Using a 3 mm (0.1 in) drill bit, drill a hole through the
pencil marks.
- Hold the cable clamp in place, each hole aligned with the
drill holes.
- Using a suitable screwdriver, screw the self-tapping mounting
screws through the bracket holes, into the drilled holes.