Controls
ControlsButtons
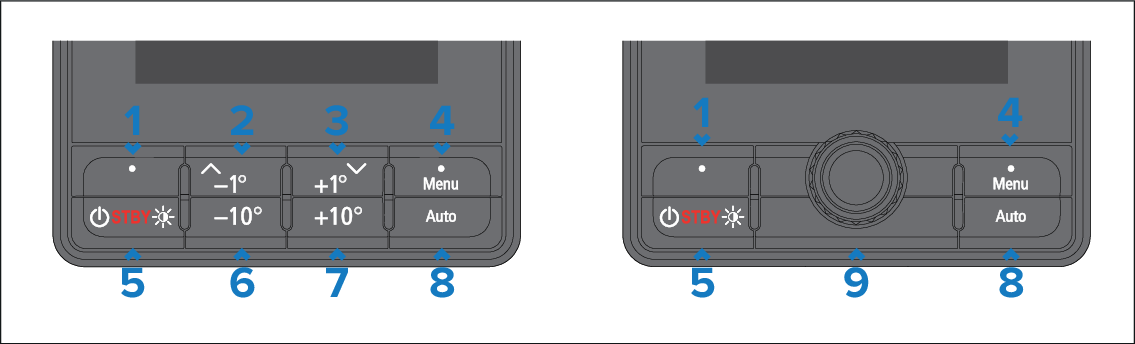
The p70s and p70Rs are pictured below. The p70 and p70R have the same control buttons as the p70s and p70Rs.
Description |
|
|---|---|
1 |
Left soft button
|
2 |
Up / -1°
|
3 |
Down / +1°
|
4 |
Menu / Right soft button
|
5 |
StandbyStandby / Power
|
6 |
–10° — Decrease heading by 10° |
7 |
+10° — Increase heading by 10° |
8 |
AutoAuto — Engage autopilot |
9 |
Rotary controllerRotary controller
|
The p70s also supports the following combination button presses:combination button presses
–1° and –10°
Auto TurnPerform an Auto Turn to port.
AutoTackIn wind vane mode, perform an AutoTack to port.
+1° and +10°
Auto TurnPerform an Auto Turn to starboard.
AutoTackIn wind vane mode, perform an AutoTack to starboard.
Any combination button press which includes the Standby button will disengage your autopilot.
By default, the Auto Turn angle is set to 90°. The turn angle can only be configured via a compatible MFD, using the Drive Settings: .