When installing handsets, the pass-through panel
kit should be used to secure the cable’s connector to the panel the
cable has to pass through.
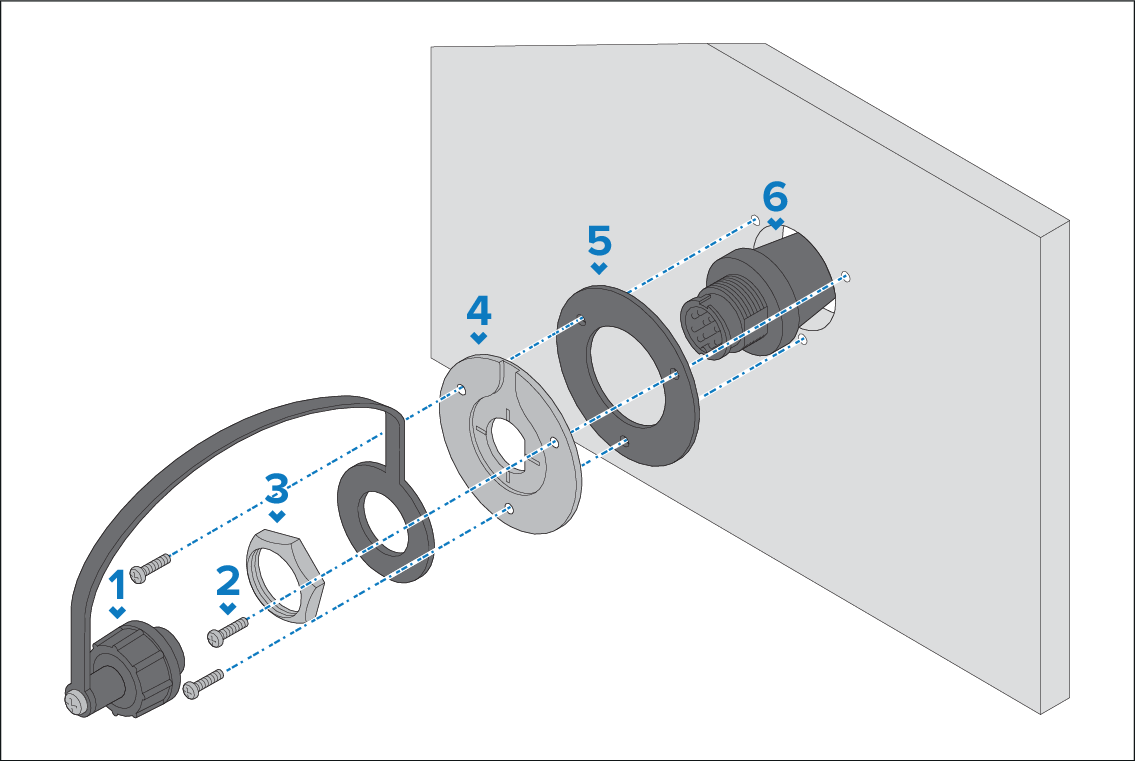
MountingPass-through panel kit
Description
1
Splash-proof dust cap with lanyard.
2
Mounting plate fixings x 3.
3
Mounting plate nut.
4
Mounting plate.
5
Mounting plate gasket.
6
Extension cable.
Check the selected location for the Mounting plate, a clear
flat area is required.
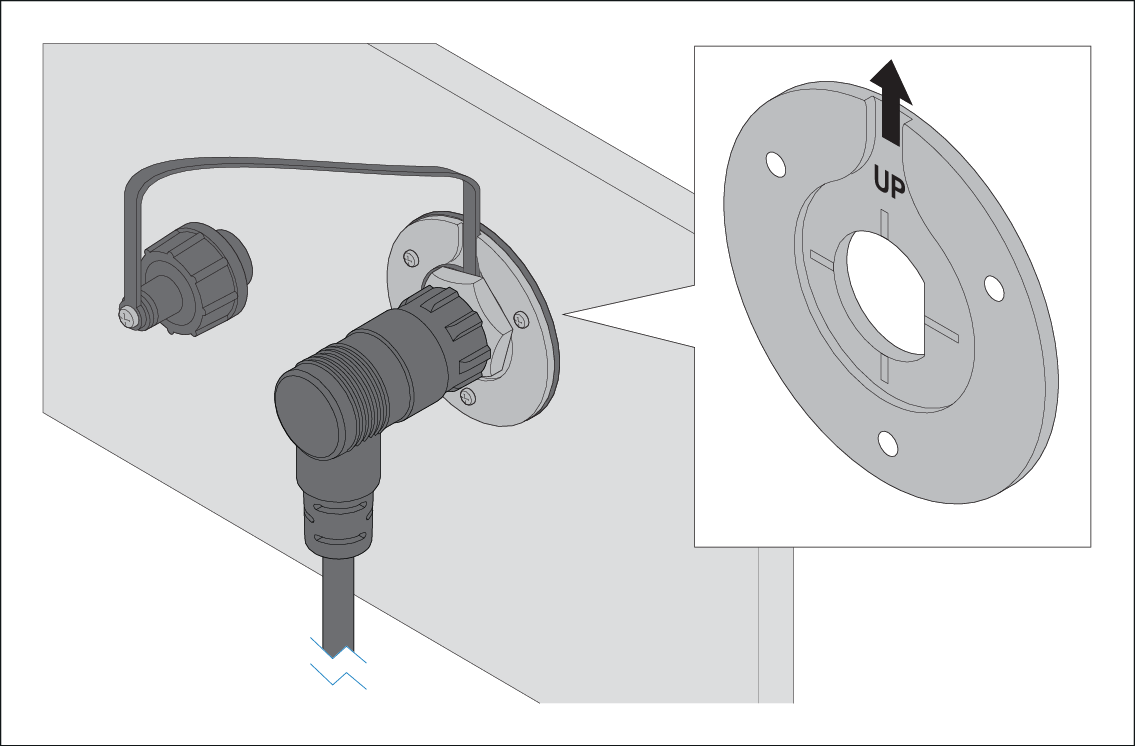
Ensuring correct orientation of the mounting plate, offer
up the plate to the desired location and mark the location of the
screw holes and the center hole on the mounting panel.
To ensure that the handset’s connector
points down when connected, orientate the mounting plate so that the
lanyard groove is pointing straight up.
Drill the mounting holes using a suitable size drill bit.
Drill the center hole using a 25 mm (1 in.) hole cutting
saw.
Pull the connector end of the cable through the hole in
the mounting surface.
Place the Mounting plate gasket over the end of the connector.
With the recessed side facing away from the mounting panel,
place the Mounting plate over the end of the connector.
Place the lanyard end of the Splash-proof dust cap over
the connector, ensuring the lanyard sits in the recess in the Mounting
plate.
Place the Mounting plate nut over the connector and tighten
clockwise using a 13/16 in. (21 mm) socket wrench, being careful not
to damage the plastic nut by overtightening.
Secure the Mounting plate to the mounting surface using
the supplied screws.
Attach the Handset / Fistmic connector to the cable connector
and rotate the locking collar clockwise to secure.
Connect the opposite end of the cable to the required connector
either on the Base station or to another pass-through panel mounting
plate connector.
Note
Drill bit, tap size and tightening torque is dependent
on the thickness and type of material the unit is to be mounted on.