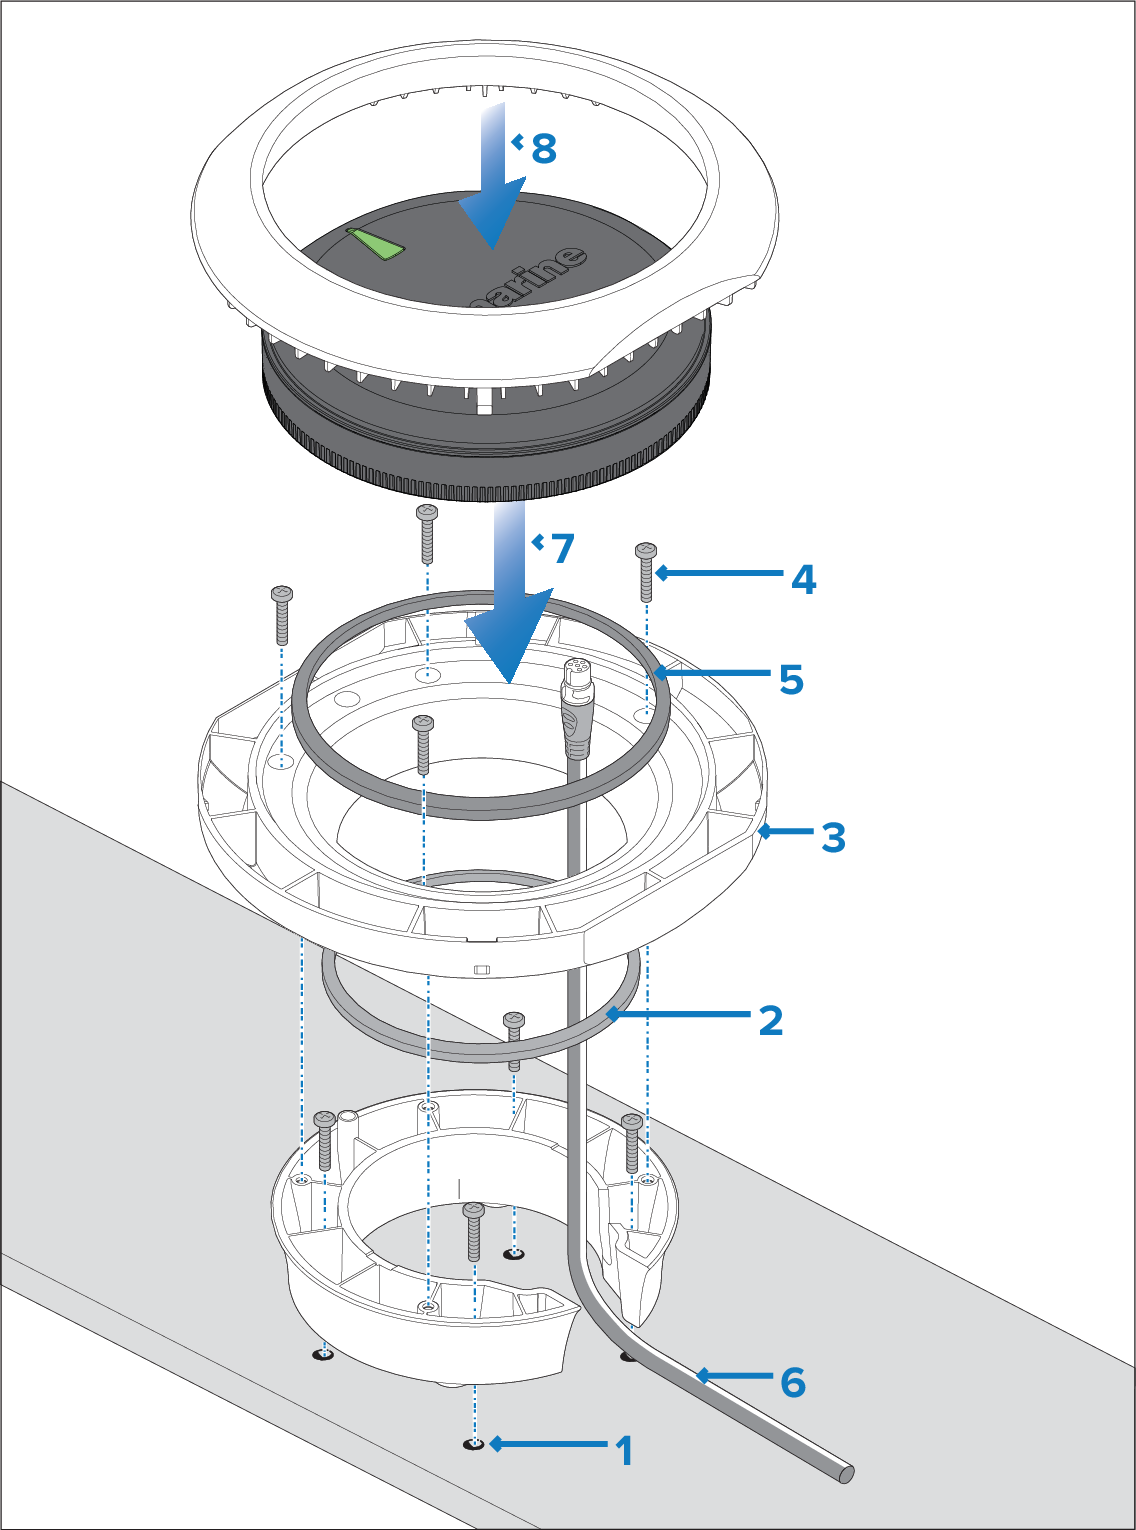
The optional deck mounting kit (A80437) can be used to raise the product from the mounting surface, for
installations where the cabling needs to be above-surface.
InstallationSurface mount (with riser)Surface mount (with riser)
The wall bracket is not required when using the riser.
- Use the deck mount riser template (87280) provided with the kit (A80437) to drill 4 holes
in the mounting surface. Secure the riser to the mounting surface
using the 4 supplied fixings.
- Place the small sealing ring in the groove located on the
bottom of the mounting tray.
- Position the mounting tray on top of the riser.
- Secure the mounting tray to the riser using 3 supplied
fixings.
- Place the large sealing ring into the groove on the upper
side of the mounting tray.
- Pull the SeaTalk NG cable through the riser and mounting tray. Plug in the cable connector
on the underside of the product and secure by rotating the locking
collar clockwise 2 clicks.
Note If there is not enough space in the riser to
accommodate the cable and to plug the SeaTalk NG spur cable into the product,
you may need to obtain a spur cable with a right-angled elbow connector
(A06081) or a right-angled elbow adaptor (A06077).
- Insert the product into the mounting tray, ensuring the
tabs in the mounting tray are slotted into the grooves around the
edge of the product.
Note When fitting the product to the tray, ensure that the
orientation of the LED “arrow” at the top of the product is correct.
For information on the correct LED orientation, refer to the Location
requirements chapter.
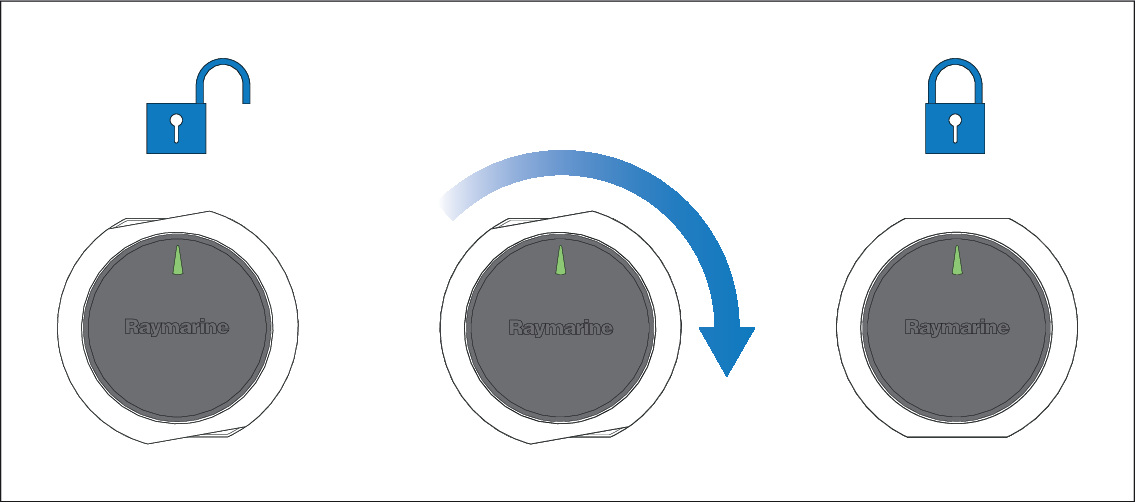
- Place the mounting trim over the product slightly offset,
and then twist the mounting trim clockwise until it locks into position.