In above decks installations, marine-grade sealant should be used
to seal the gap between the edge of the mounting surface and the edge
of the display.
Ensure you have followed the relevant instructions for
preparing the mounting surface for either surface mounting or flush
mounting.
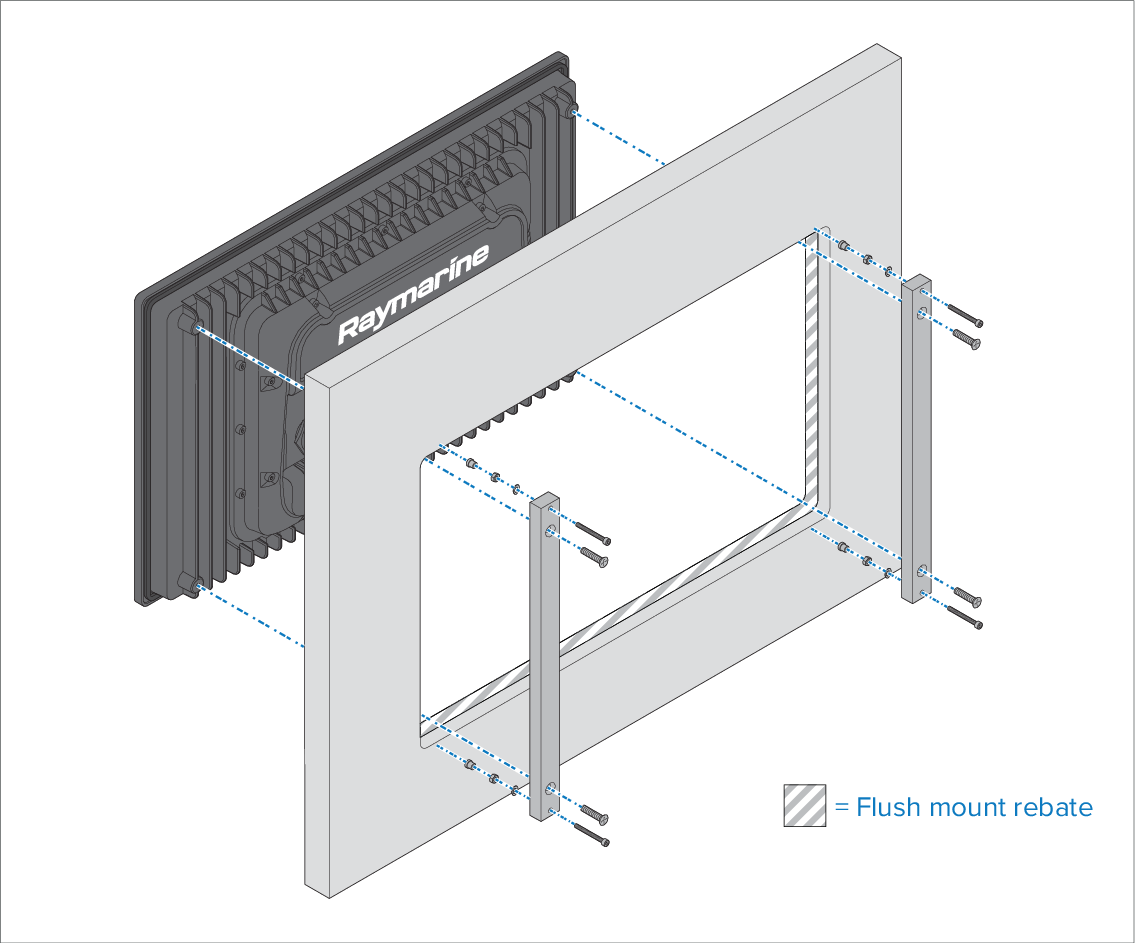
Route the relevant cables to behind the mounting surface
cut out.
This may be difficult or not possible once the display has
been mounted.
With one person holding the display in place, the second
person should attach the mounting bars to the back of the display
using the supplied countersunk screws, in the 4 locations shown.
Secure the display using the provided mounting fixings
(M5 bolt, wavy washer, nut and foot, in the 4 locations shown).
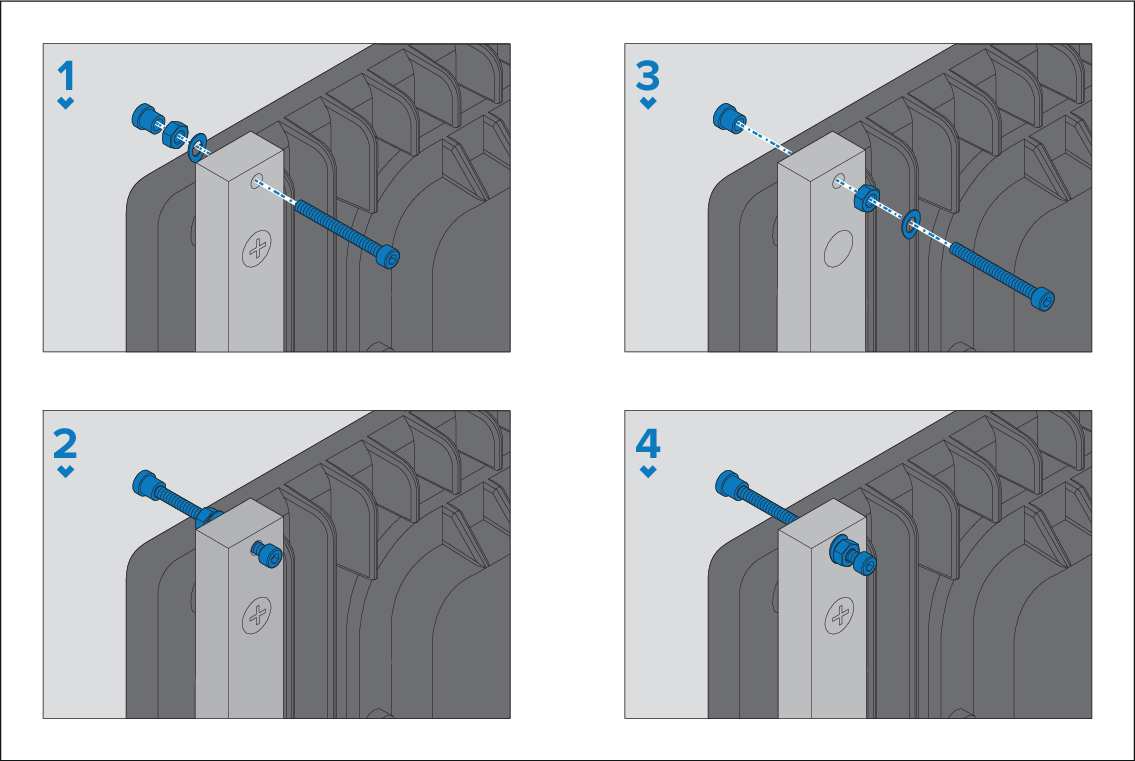
Depending on the thickness of the mounting surface,
the washer and nut may be located:
between the mounting bracket and mounting feet, as shown in
(1) and (2) below, or:
after the mounting bracket, as shown in (3) and (4) below.
Using a 4 mm Hex (Allen) wrench, tighten the mounting bar
bolts, ensuring that the feet are tight against the rear of the mounting
surface.
Using a 8 mm wrench or adjustable wrench, tighten the nut
against the washer and the mounting bar to lock in position.
The nut should be tightened sufficiently to securely
hold the display in position.