Display trunnion mounting preparation
Axiom® 2 Pro 16 displays are intended to be either surface or flush mounted. An optional Trunnion bracket kit (part number: A80722) is available if trunnion mounting is desired. For trunnion mounting, the display needs to be prepared using the parts supplied in the A80722 kit.
Important
The display is supplied with rubber trunnion bungs fitted, which must be removed before the display is trunnion mounted. Do NOT attempt to trunnion mount the display using the trunnion bungs.
To prepare the display for trunnion mounting, follow the steps below, for both sides of the display:
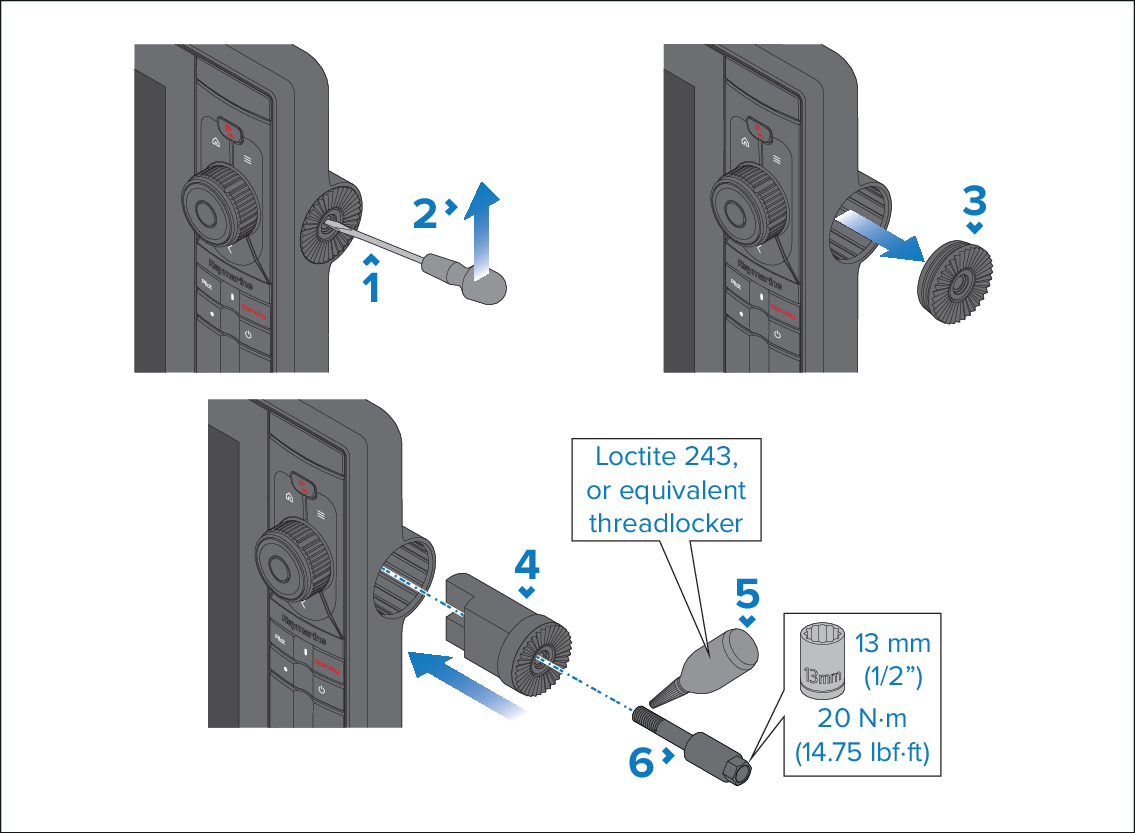
The display can now be trunnion mounted.