Trunnion bracket mounting

Axiom® 2 Pro displays can be mounted on a trunnion bracket. Axiom® 2 Pro 9 and Axiom® 2 Pro 12 displays are supplied with a trunnion bracket. An optional trunnion bracket kit is available for the Axiom® 2 Pro 16 (part number: A80722).
Note

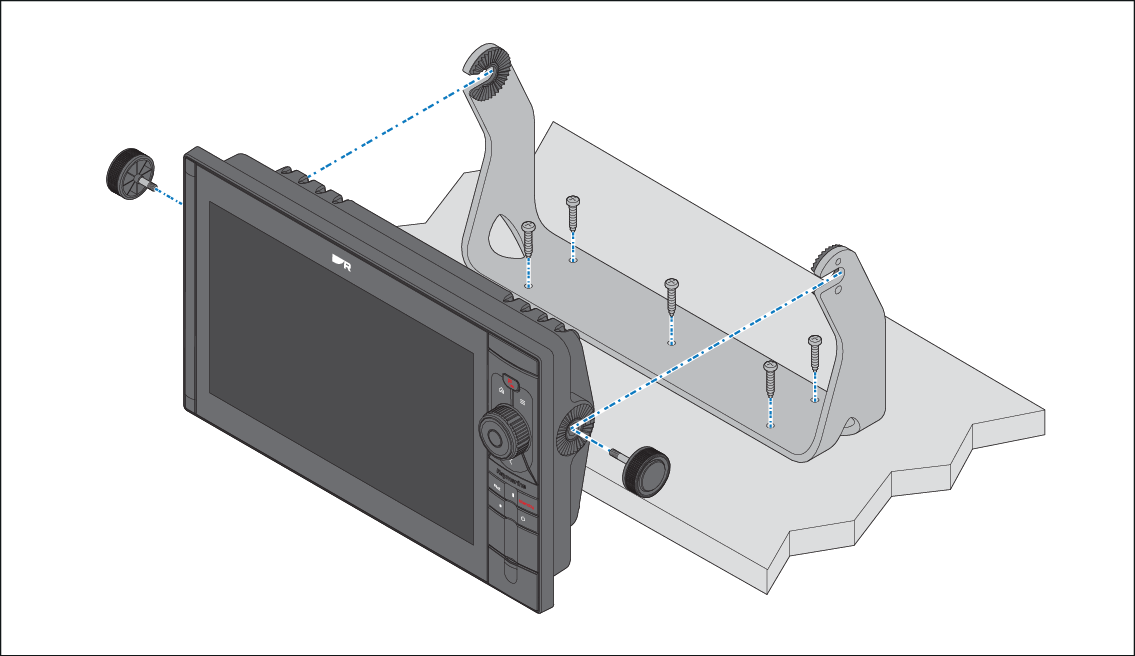
Fixings to the secure the trunnion bracket to a mounting surface are not provided. 5 x self tapping screws are required. The screws should be suitable for the mounting surface material and the 5.75 mm (0.23 in) diameter mounting holes in the trunnion bracket.

InstallationTrunnion mountingEnsure you have chosen a suitable mounting location for your display, which has sufficient head room to allow the display’s angle to be adjusted or the display to be removed if necessary. If installing ‘above head’ take extra care to ensure the knobs are tightened sufficiently to prevent them coming loose due to vibration when underway.

  1. Check the underside of the mounting surface to ensure no damage will be caused by drilling.
  2. Check the thickness of the mounting surface to ensure it is sufficient to support the display.
  3. Using the Trunnion bracket as a template, mark and drill the 5 x pilot holes on the mounting surface.
  4. Secure the trunnion bracket to the mounting surface using your self tapping screws and an appropriate screwdriver.
  5. Insert the trunnion knobs into the sides of the display and tighten 3 to 4 turns.
  6. Slide the display into the trunnion bracket so that the trunnion knob threads are slotted into the recesses in the trunnion bracket.
  7. Secure the display by fully tightening the trunnion knobs, ensuring that the ratchet teeth are correctly engaged.

    The knobs should be tightened by hand, sufficiently to prevent the display from moving whilst your vessel is underway.

  8. Route and connect necessary cables.