Ensure
you have chosen a suitable mounting location for your display, which
has sufficient head room to allow the display’s angle to be adjusted
or the display to be removed if necessary. If installing ‘above head’
take extra care to ensure the knobs are tightened sufficiently to
prevent them coming undone due to vibration when underway.
Note
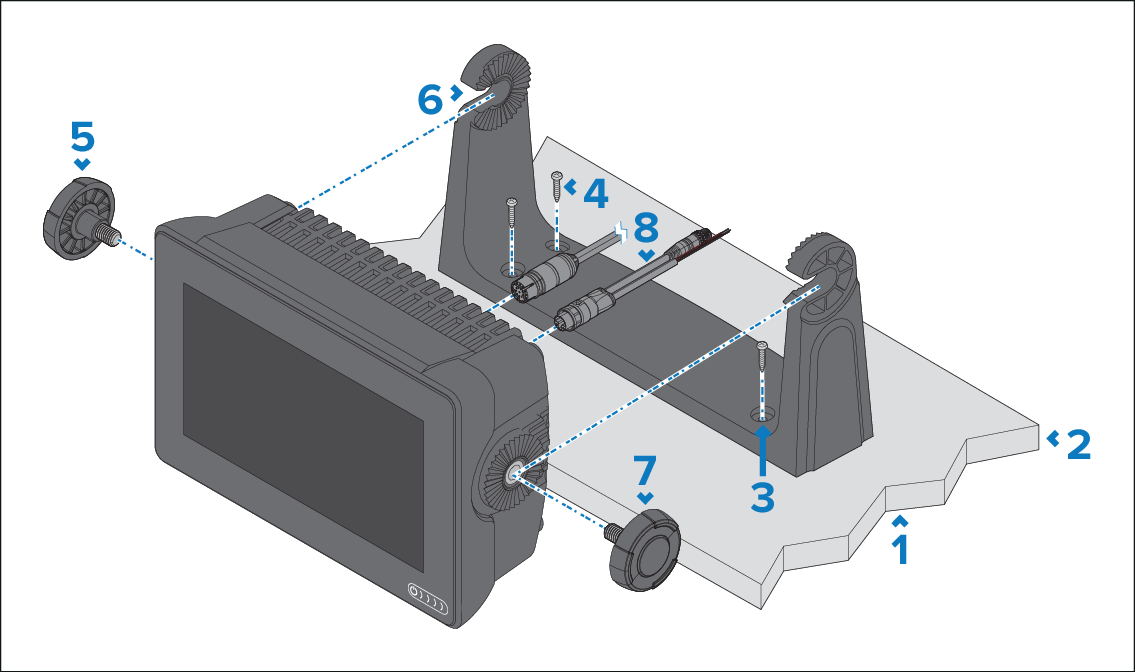
The above illustration
depicts an Axiom+7 being mounted on a plastic trunnion bracket. The trunnion
bracket supplied with the Axiom+9 and Axiom+12 are
made from metal, and so will look different from the example shown.
A metal trunnion bracket is also available for the Axiom+7 as
an accessory — part number: R70524.
Check the underside of the mounting surface to ensure no
damage will be caused by drilling.
Check the thickness of the mounting surface to ensure it
is sufficient to support the display.
Using the trunnion bracket as a template, mark and drill
each pilot hole on the mounting surface.
Secure the trunnion bracket to the mounting surface using
your self tapping screws and an appropriate screwdriver.
If the mounting surface is too thin for the self tapping
screws, use stainless steel machine screws, washers and locking nuts
to secure the trunnion bracket to the mounting surface. Alternatively,
look to reinforce the rear of the mounting surface.
Insert the trunnion knobs into the sides of the display
and partially tighten.
Slide the display into the trunnion bracket so that the
trunnion knob threads are slotted into the recesses in the trunnion
bracket.
Secure the display by fully tightening the trunnion knobs,
ensuring that the ratchet teeth are correctly engaged.
The knobs should be tightened by hand, sufficiently to prevent
the display from moving whilst your vessel is underway.