Before mounting the product, ensure that you have:
Selected a suitable location, based on the location requirements
found in this document.
Identified the relevant cable connections and the route that
the cables will take.
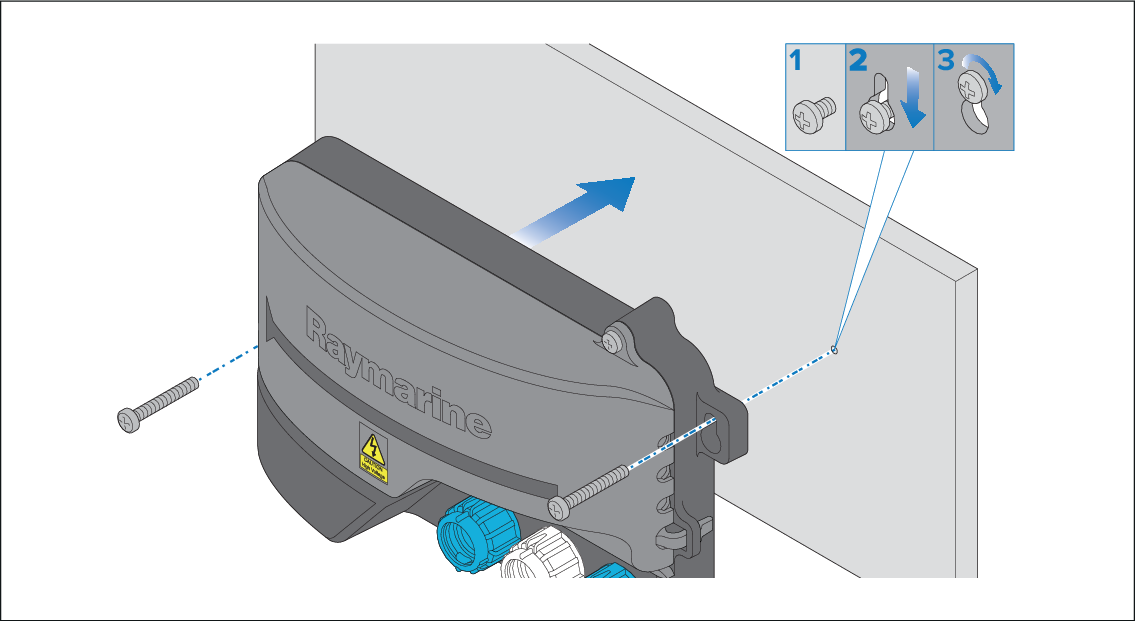
MountingNote The unit must be
mounted horizontally, with the connectors facing outwards.
- Prepare the mounting surface:
- Fix the supplied mounting template to the chosen location,
using masking or self-adhesive tape.
- Drill 2 holes as indicated on the template to accept
the fixings.
- Remove the mounting template.
- Screw the fixings approximately half way into the holes
in the mounting surface.
- Place the unit over the fixing screws and push the unit
downwards to engage the keyhole slots.
- Fully tighten the screws.
- Remove the cover:
- Unscrew the front cover retaining screw.
- Push in the cover clip located on the right hand side.
- Pull the right hand side of the cover away from the
unit slightly.
- Pull the left hand side of the cover away from the unit.
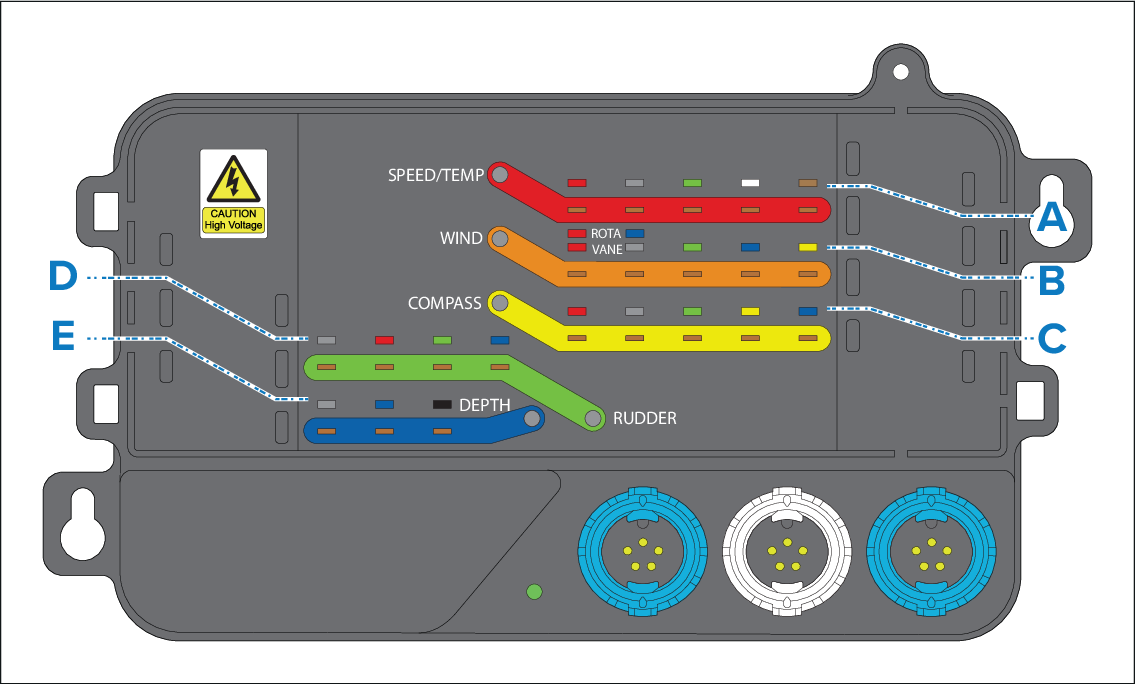
- Route and connect the required transducer cables:
|
Description |
A |
Speed and sea temperature transducer cable guide. |
B |
Wind transducer / Rotavecta cable guide. |
C |
Fluxgate compass cable guide. |
D |
Rudder reference transducer cable guide |
E |
Depth transducer cable guide. |
- Connect the required transducer and SeaTalk NG cables.
- Replace converter cover, ensuring that the transducer cables
are placed into the relevant cable guides / channels, as shown.
- Switch on power supply and check system.