Controls
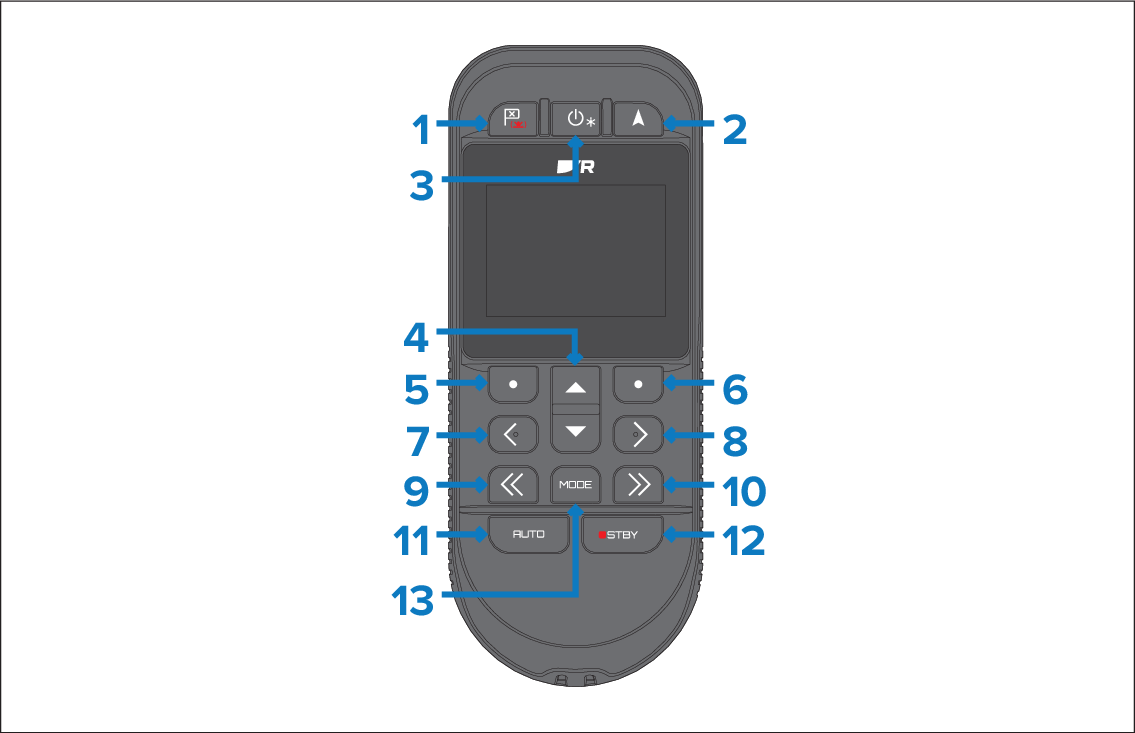
The RCU-1 has physical buttons which are used to interact with the remote’s user interface. The details below describe the buttons and their functions.
General usage:
Buttons 2, and 7 to 13 are used to control the autopilot.
Buttons 3 to 6 are used to control the remote’s user interface.
Description |
|
|---|---|
1 |
Waypoint / MOB — Press momentarily to place a waypoint at your vessel’s location. A long press activates the Man Overboard (MOB) alarm. |
2 |
Point and Go — Press to capture the remote’s current bearing and place a GoTo at a defined distance. |
3 |
Power
|
4 |
Up / Down — Use these buttons to move through menus, modify numeric settings, or adjust brightness from the Brightness page. |
5 |
Left Softkey — The button’s action is context-dependent, and is identified on the screen above the button. |
6 |
Right Softkey — The button’s action is context-dependent, and is identified on the screen above the button. |
7 |
< (Left 1°) — Change Heading, Rudder angle, or Wind direction offset to port by 1° (one degree). |
8 |
> (Right 1°) — Change Heading, Rudder angle, or Wind direction offset to starboard by 1° (one degree). |
9 |
<< (Left 5° / 10°)
|
10 |
>> (Right 5° / 10°)
|
11 |
AUTO — Press to engage the autopilot in Steer to Heading mode. |
12 |
STBY — Press to disengage the autopilot. |
13 |
MODE — Press to open the autopilot modes menu. |