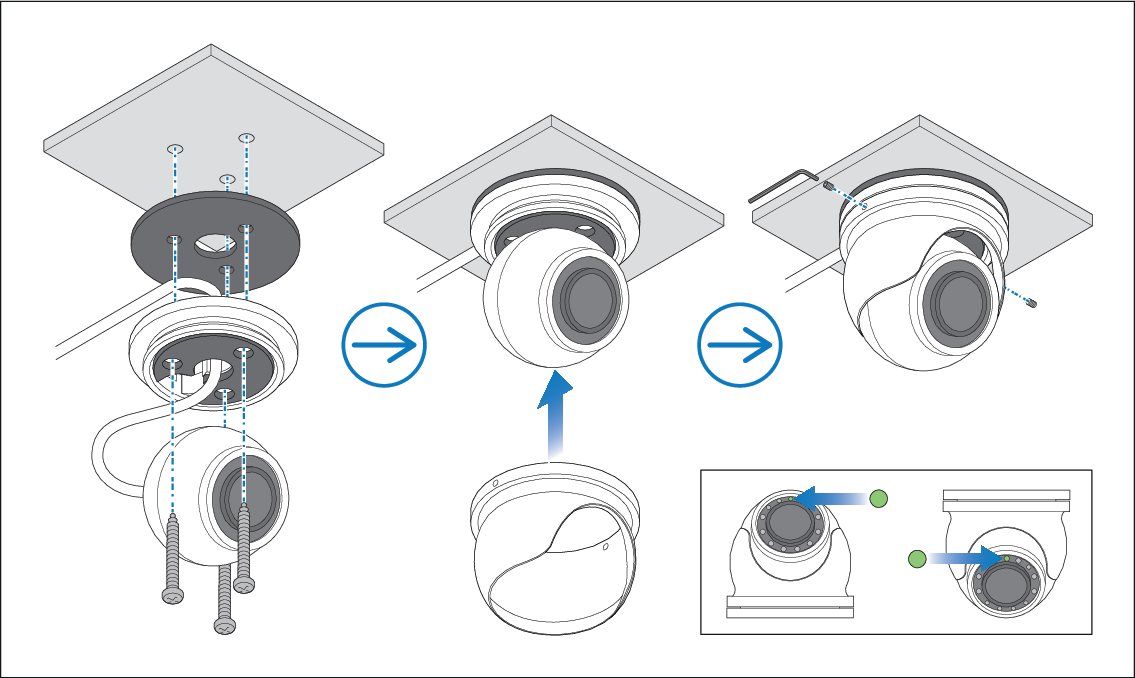
The camera is supplied partly assembled. The external
metallic collar protects the camera ball when the camera is in use.
You must (re)attach the collar to the camera base after mounting the
camera.
Having chosen a suitable location, install the
unit as follows:
Remove all components from the box.
Check the selected location for the unit. A clear, flat
area is required, which is suitable for the mounting screws.
Use the supplied mounting template to mark out the location
of the mounting holes.
Drill the holes required at the marked locations.
Remove the grub screws from the side of the camera’s base
using the supplied hex wrench (Allen key).
Disconnect the camera body and collar from the base of
the camera.
Feed the fitted cable through the camera base’s cable channel.
Example: above-surface cabling
Peel the adhesive cover off of the waterproof gasket.
Align the waterproof gasket underneath the camera’s base
with the mounting screw holes, and attach the gasket onto the camera
base.
Secure the base in position using the mounting screws provided.
Connect the camera’s fitted cable to the relevant power
and network connections.
Adjust the position of the ball by hand so that the camera’s
green infrared sensor is centered at the top.
Power up the system and check the camera’s video feed.
Adjust the position of the ball by hand to obtain the best
picture, along with the collar if your camera’s view is obscured.
Align and re-insert the grub screws.
Note
Augmented Reality objects will not appear correctly
onscreen if the camera is centered inaccurately.