IP address discovery via ONVIF Device Manager
The following instructions are subject to change depending upon which version of ONVIF Device Manager you are running.
SetupWeb browserIP address discovery (ONVIF Device Manager)
In order to access the camera’s IP address and Web browser user interface using ONVIF Device Manager, follow the steps listed below:
- Double-click and open the ONVIF Device Manager executable once the installation has finished.
The following ONVIF Device Manager homescreen will be displayed:
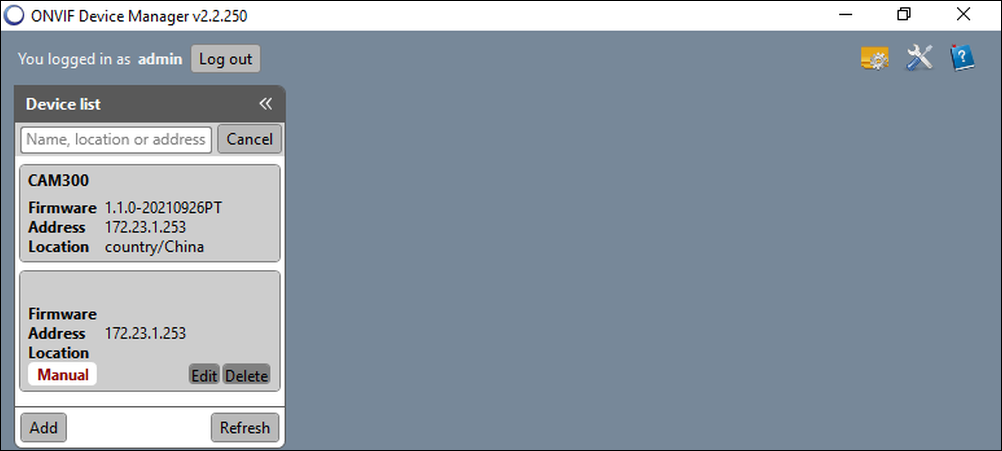
You can now access the CAM300’s Web interface by typing the IP address found under the ONVIF Device Manager Device list into one of the supported Web browsers in the following format: http://xxx.xx.x.xxx.
IP cameras can take up to 60 seconds to appear on a network. If the CAM300 does not appear under the ONVIF Device Manager Device list, ensure that you have waited a sufficient amount of time before attempting to Refresh.
If you cannot connect to the Web browser user interface after entering the camera’s IP address into your default browser, ensure that your computer is using the same IP address range as the camera before re-trying. For more information, refer to: Camera IP address discovery
For further information on which Web browsers are supported, refer to the following section: