Routing cables through the riser’s sidewall
Ideally, the camera’s cables should be routed through a mounting surface cutout which is weather-tight and protected from water ingress, fouling, and sun damage. However, if this is not possible, the cables can alternatively be routed through the riser’s sidewall. An optional 29 mm (1.14 in) wide, removable hatched area is provided on the riser for this purpose.
Use the following instructions to remove the riser’s sidewall hatched area:
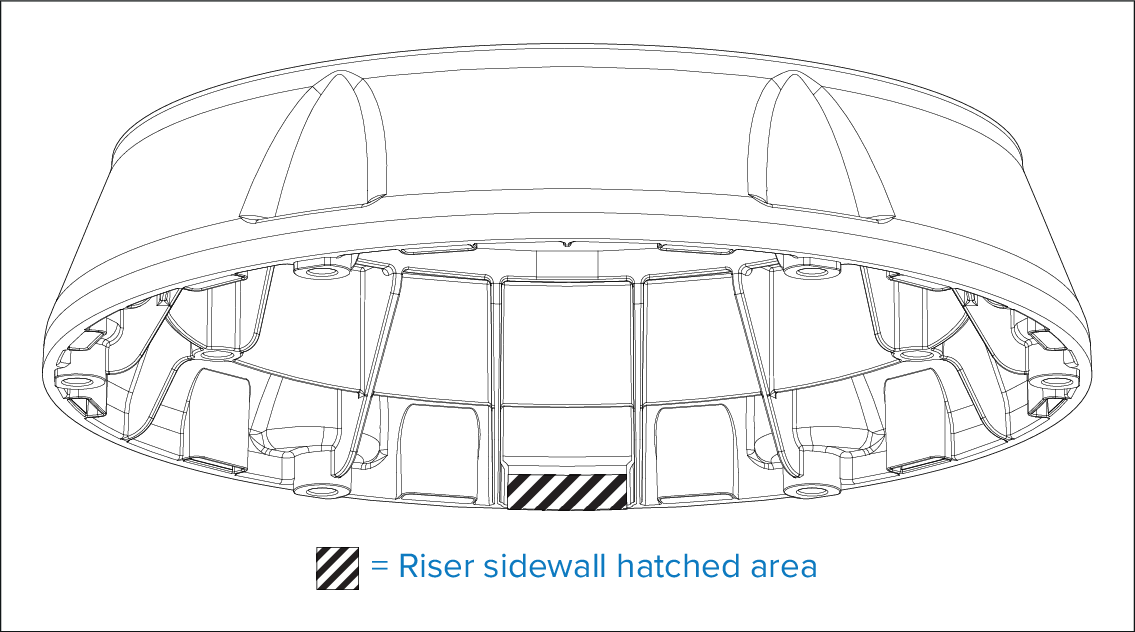
The riser shown above reflects the latest riser design (riser part number 1017892, which can be found printed on the underside of the riser). For instructions reflecting the legacy riser design (riser part number 1009714, which can be found printed on the underside of the riser), refer to: Routing cables through a (legacy) riser’s sidewall
- On the underside of the riser, mark the sidewall hatched area location, as identified on the supplied Mounting Template document (77006).
- Use a half-round file or a rotary tool to remove the sidewall hatched area.
- Use a half-round file and / or sandpaper to smooth any rough edges or burs on the removed area.